Interview naturally
Follow the conversation wherever it goes. The template sorts the answers into the right sections afterwards.
Leave out the noise
Small talk, logistics, and tangents don’t have to end up in your notes. You decide what a section is looking for.
Mirror your scorecard
Build a template with one section per scorecard field, and filling the scorecard becomes copy-and-paste.
One default template is the exception, by design: Question and Answer follows the order questions were actually asked, because that structure is the point of it. Every other template — and any custom template — organizes by topic instead. See the default templates.
Elyse shows you how to build custom templates.
Where templates live
Open any captured call and clickUse template at the top of the notes editor to open the template library. If you haven’t captured a call yet, open the demo call. Templates are also available from Templates in the Notes section of the sidebar.
From there you can choose a default template, customize one, build your own from scratch, or pick a template someone on your team already made.

The default templates
Each has a different purpose, and not every template suits every kind of call.The Question and Answer template and TLDR both depend on knowing which participant is the candidate. If no candidate is assigned, they won’t be available — see Participants.
Create a custom template
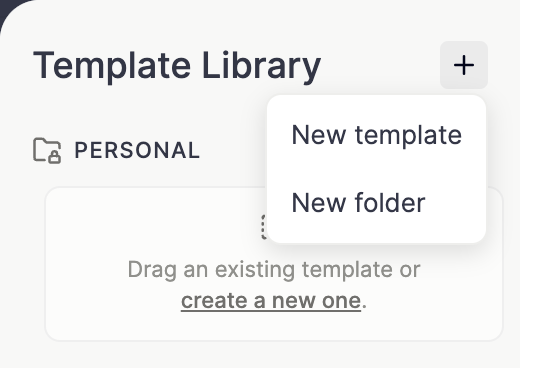
You can create a template from scratch, or start from one of Metaview’s defaults. From scratch. With a captured call open, clickUse template to open your template library. (On the legacy notes version, click Change Template instead.) Click + and select New Template in the dropdown.
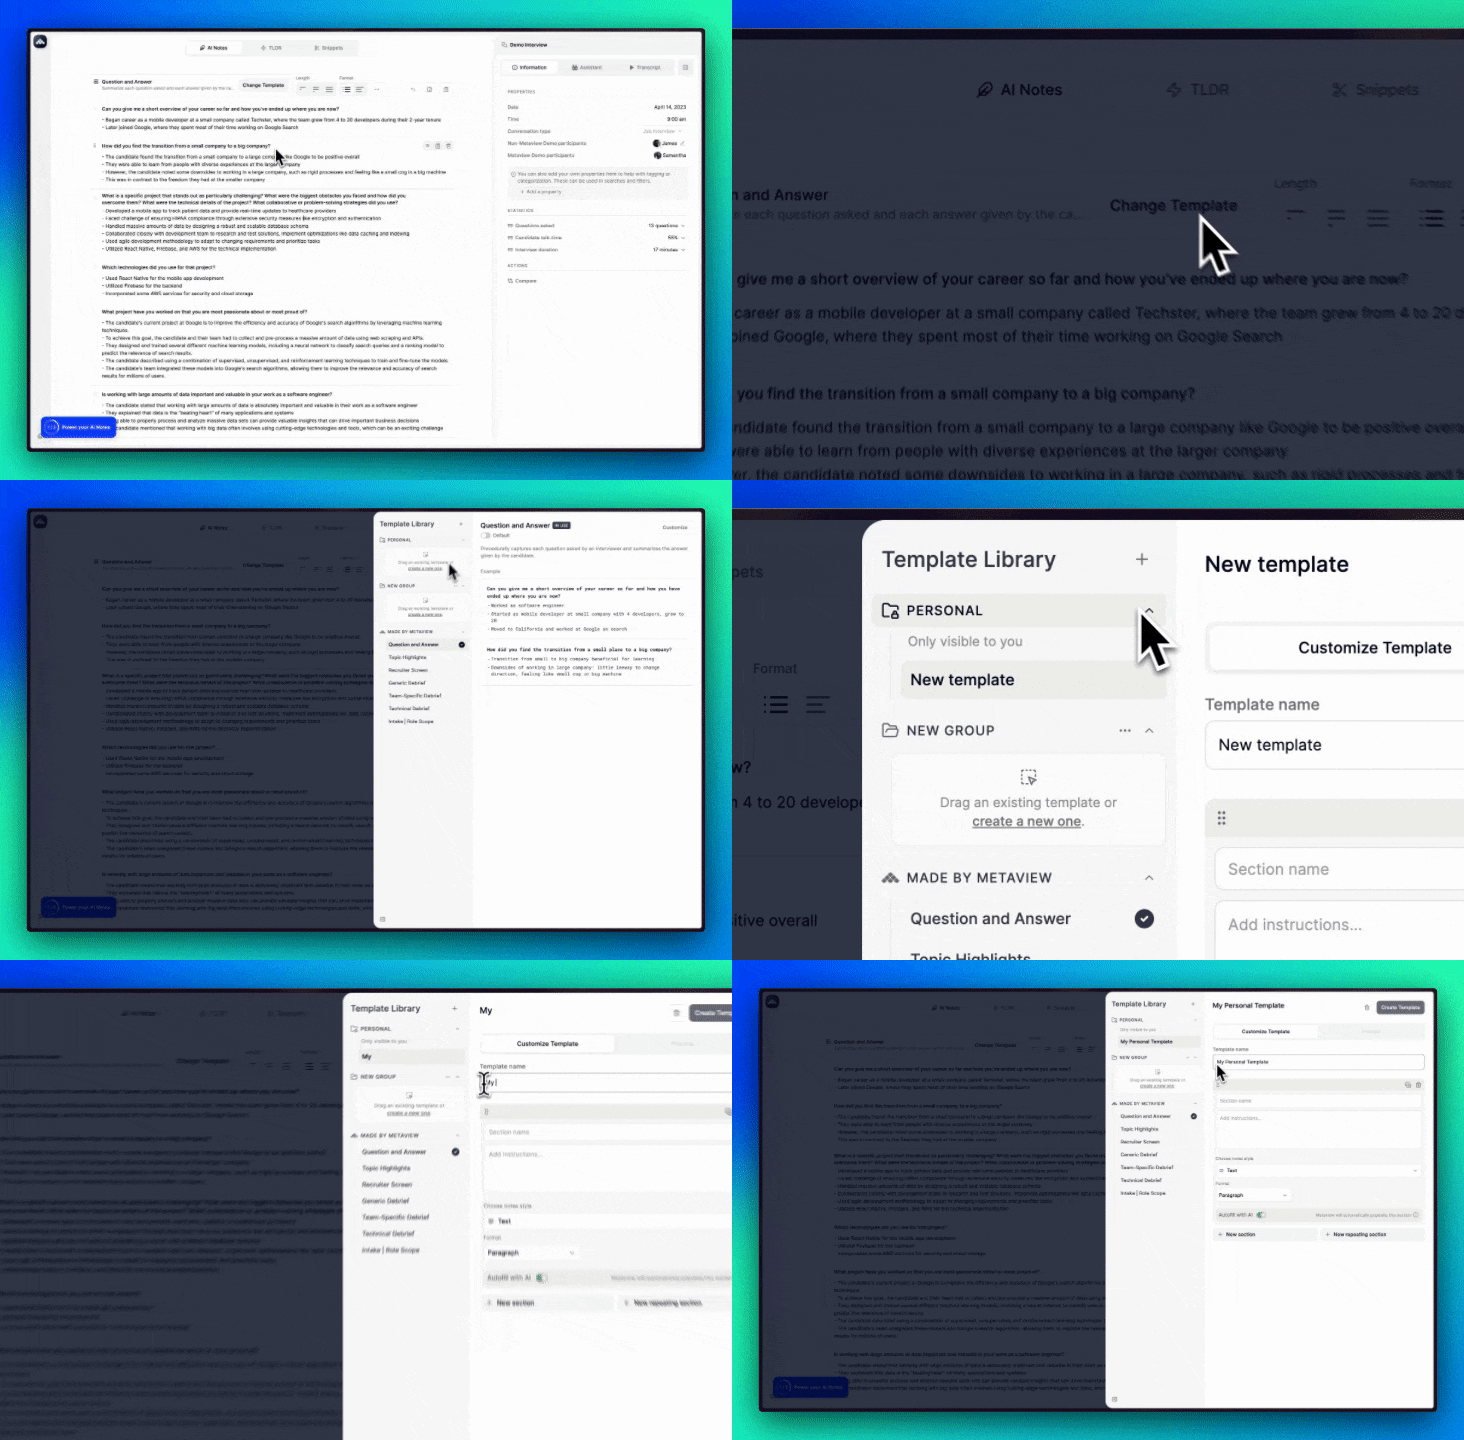
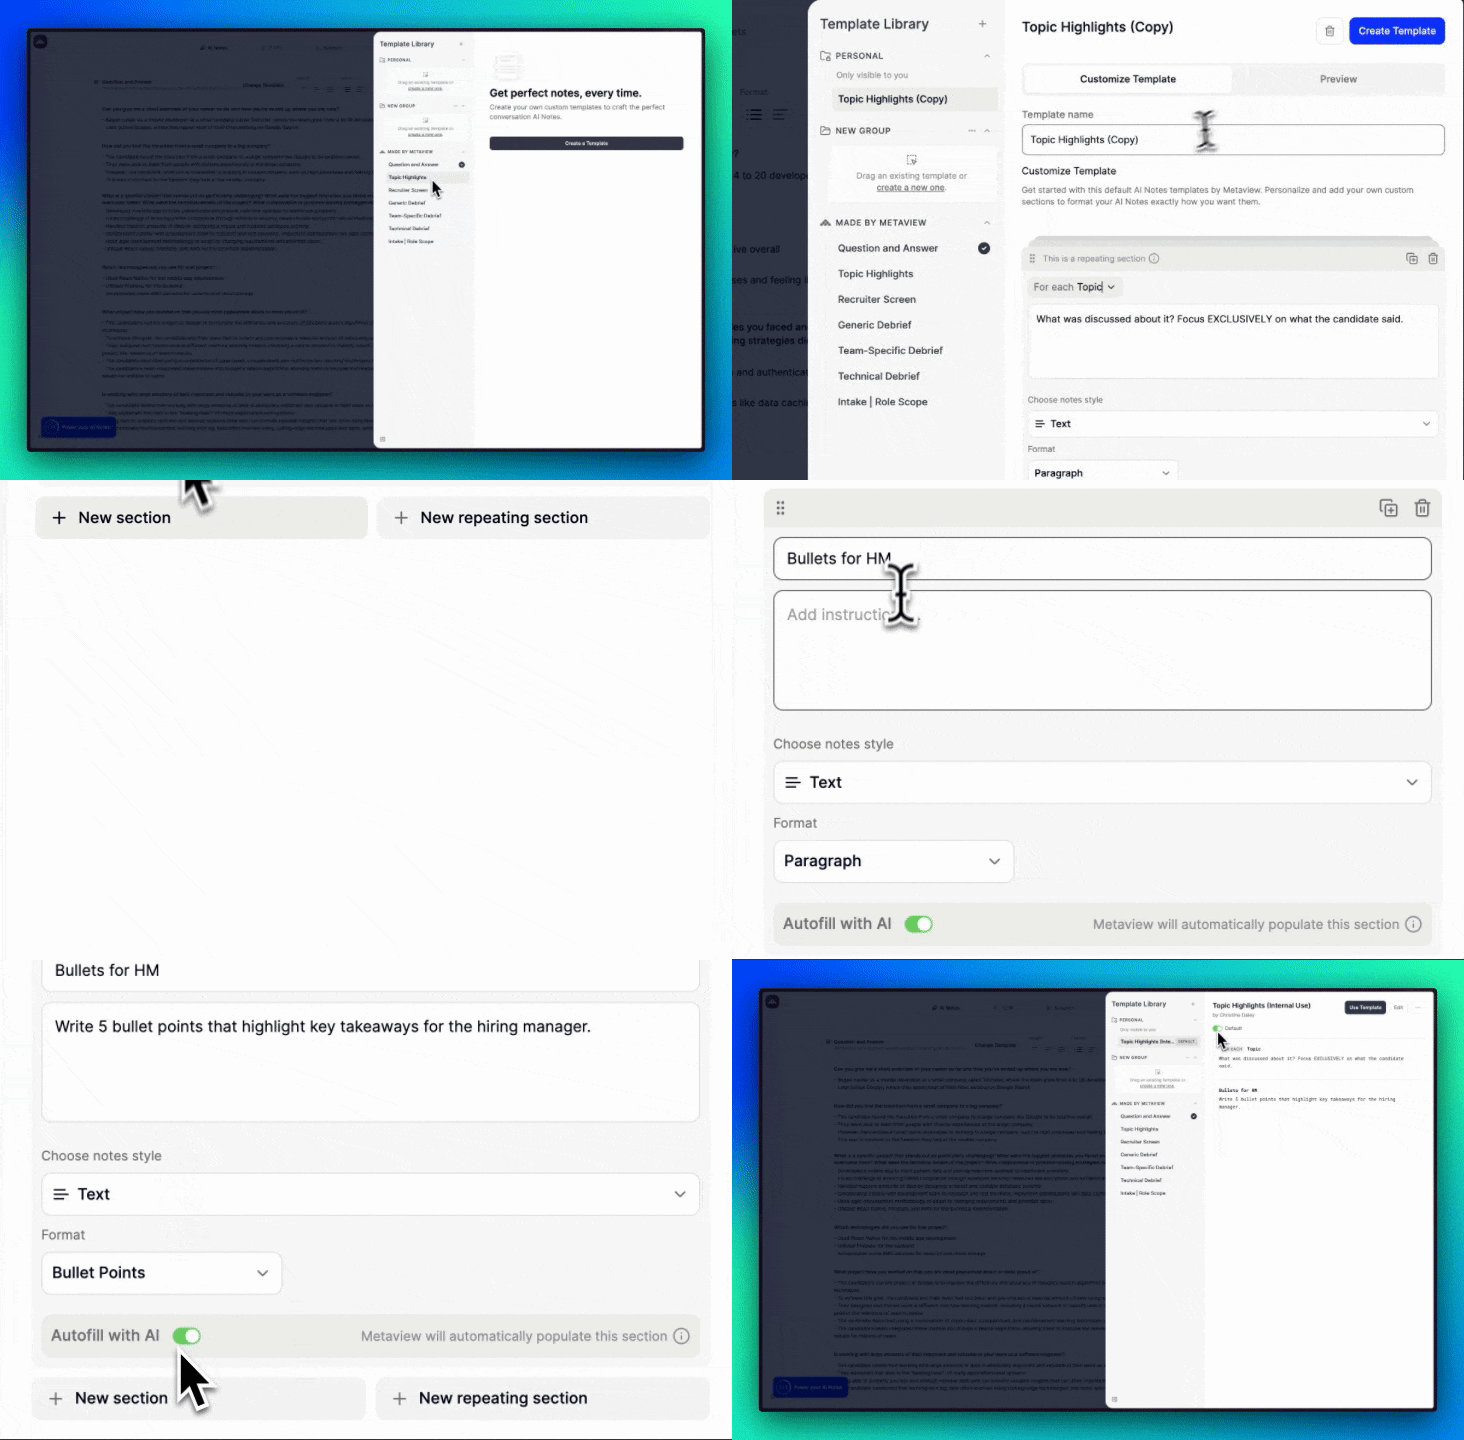
Edit to make changes, or click a template under Made by Metaview and then Customize.
Collaborate on template drafts
Shared template drafts make it easier to build and improve templates as a team. Anyone with edit access can see the latest draft and continue where a teammate left off, so progress is not tied to one person or hidden in a private workspace. To prevent changes from being overwritten, shared drafts do not support simultaneous editing. If a teammate updates the draft while you’re editing, don’t worry—your work won’t be lost. You’ll be prompted to either:- Select
Refreshto continue from the latest shared draft. - Click
Duplicate current draftto save your changes as a new private template.
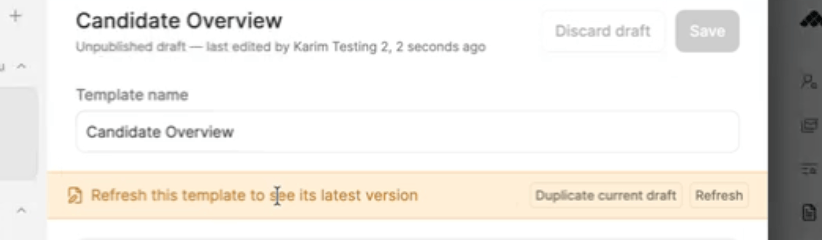
You’ll see a warning if a colleague updates the draft while you’re editing it.
Your template drafts remain private when the template itself is private (in your personal folder).
Building your template
Notes sections Templates are organized by the notes sections. Each section will need a section header and instructions you want to give to Metaview AI, or for yourself and others on what to write/include. You can also let AI do more of the heavy lifting and get higher quality output from your conversation data — just type what you want the output to be in each section, and clickImprove Prompt.
Add instructions is a required field for each section with the autofill toggle on. You will not be able to save and use a template if one of the required sections is blank.
Markdown formatting
Markdown is a formatting language that makes it easy to style text without using complex tools. If you want the generated notes to show up with bold, italic and other standard text formatting options, add the phrase “Use markdown to format the output” in your custom template instructions. Here are some basics that you can also try to add to your custom template instructions for additional emphasis and structure:
- To generate words in Bold: Use double asterisks
**bold text** - To generate words in Italic: Use single asterisks
*italic text* - To generate words in
Strikethrough: Use double tildes~~crossed out~~ - To generate bullet points: Use a dash and a space
- First item
Autofill with AI in the section footer and Metaview will not automatically populate that section, if you want to fill in a section manually yourself.
Repeating sections
In some cases you’ll want to generate multiple sections, one for each item (e.g. topic, question, previous job) which was discussed in the interview without knowing exactly what each item was.
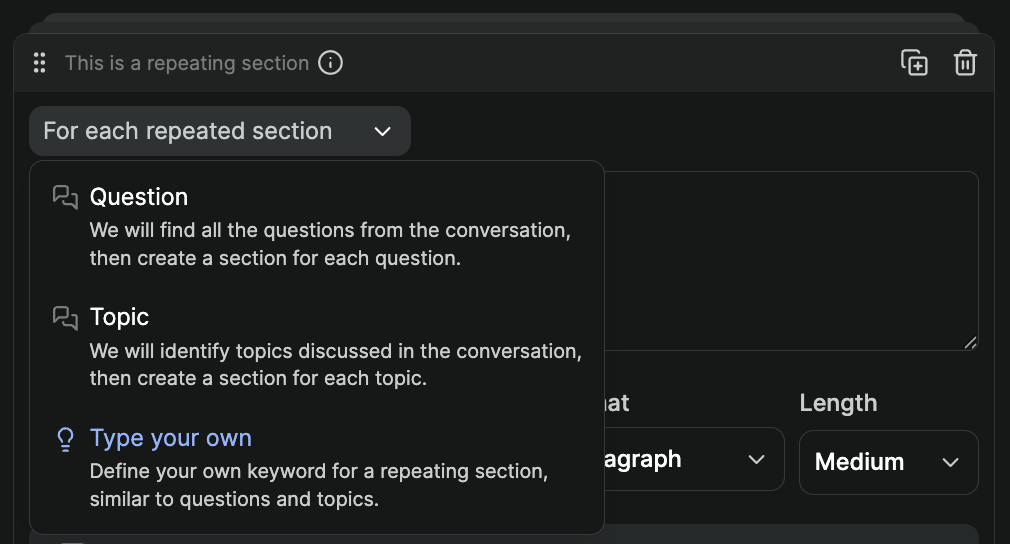
For Each X, e.g. For each Topic, outline what was discussed focusing mainly on what was said by the candidate. Metaview will then produce one section for each Topic or Your own keyword in your Notes. You can also create your own repeating section by picking Type your own and enter what you want the section to repeat on.
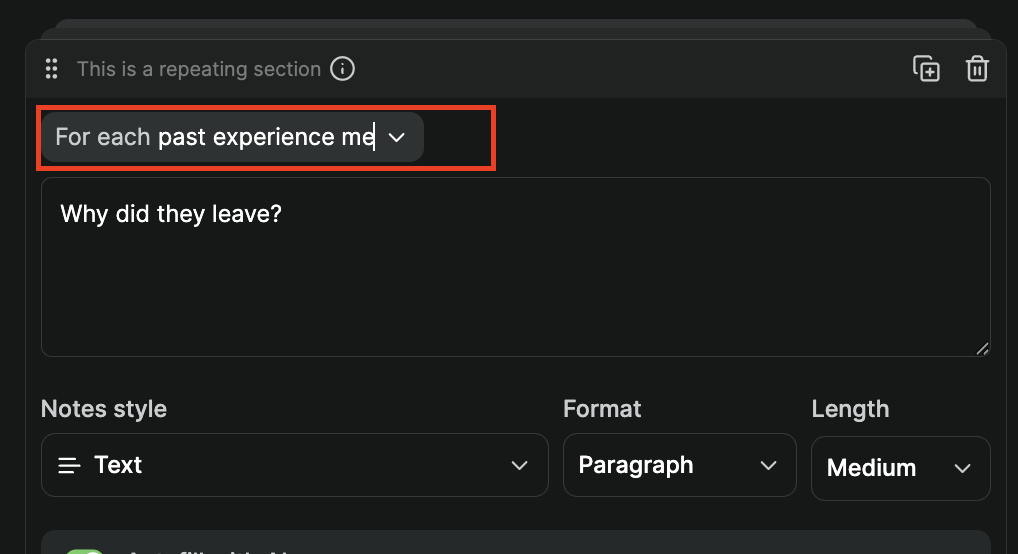
🗑️ (trashbin) icon.
Preview template
Click on Preview to see how your new template would work with your currently selected call.
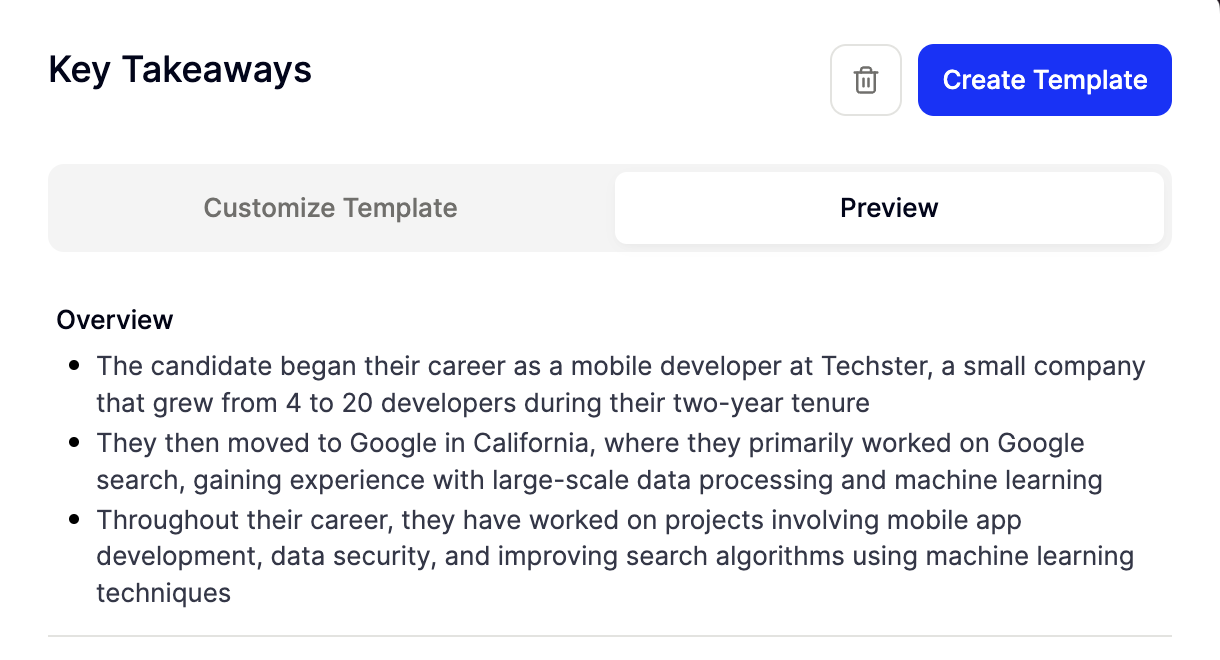
Create Template to save your new template. Otherwise, you can click back on Customize Template to continue building or editing your template.
Adding context
When creating a custom template in Metaview, you can enhance it by including additional context. This feature allows you to provide crucial background information for more accurate AI-generated outputs. Whether it’s a job description, company values, or past notes on a candidate, adding context ensures that the AI understands the bigger picture and incorporates relevant details into the template.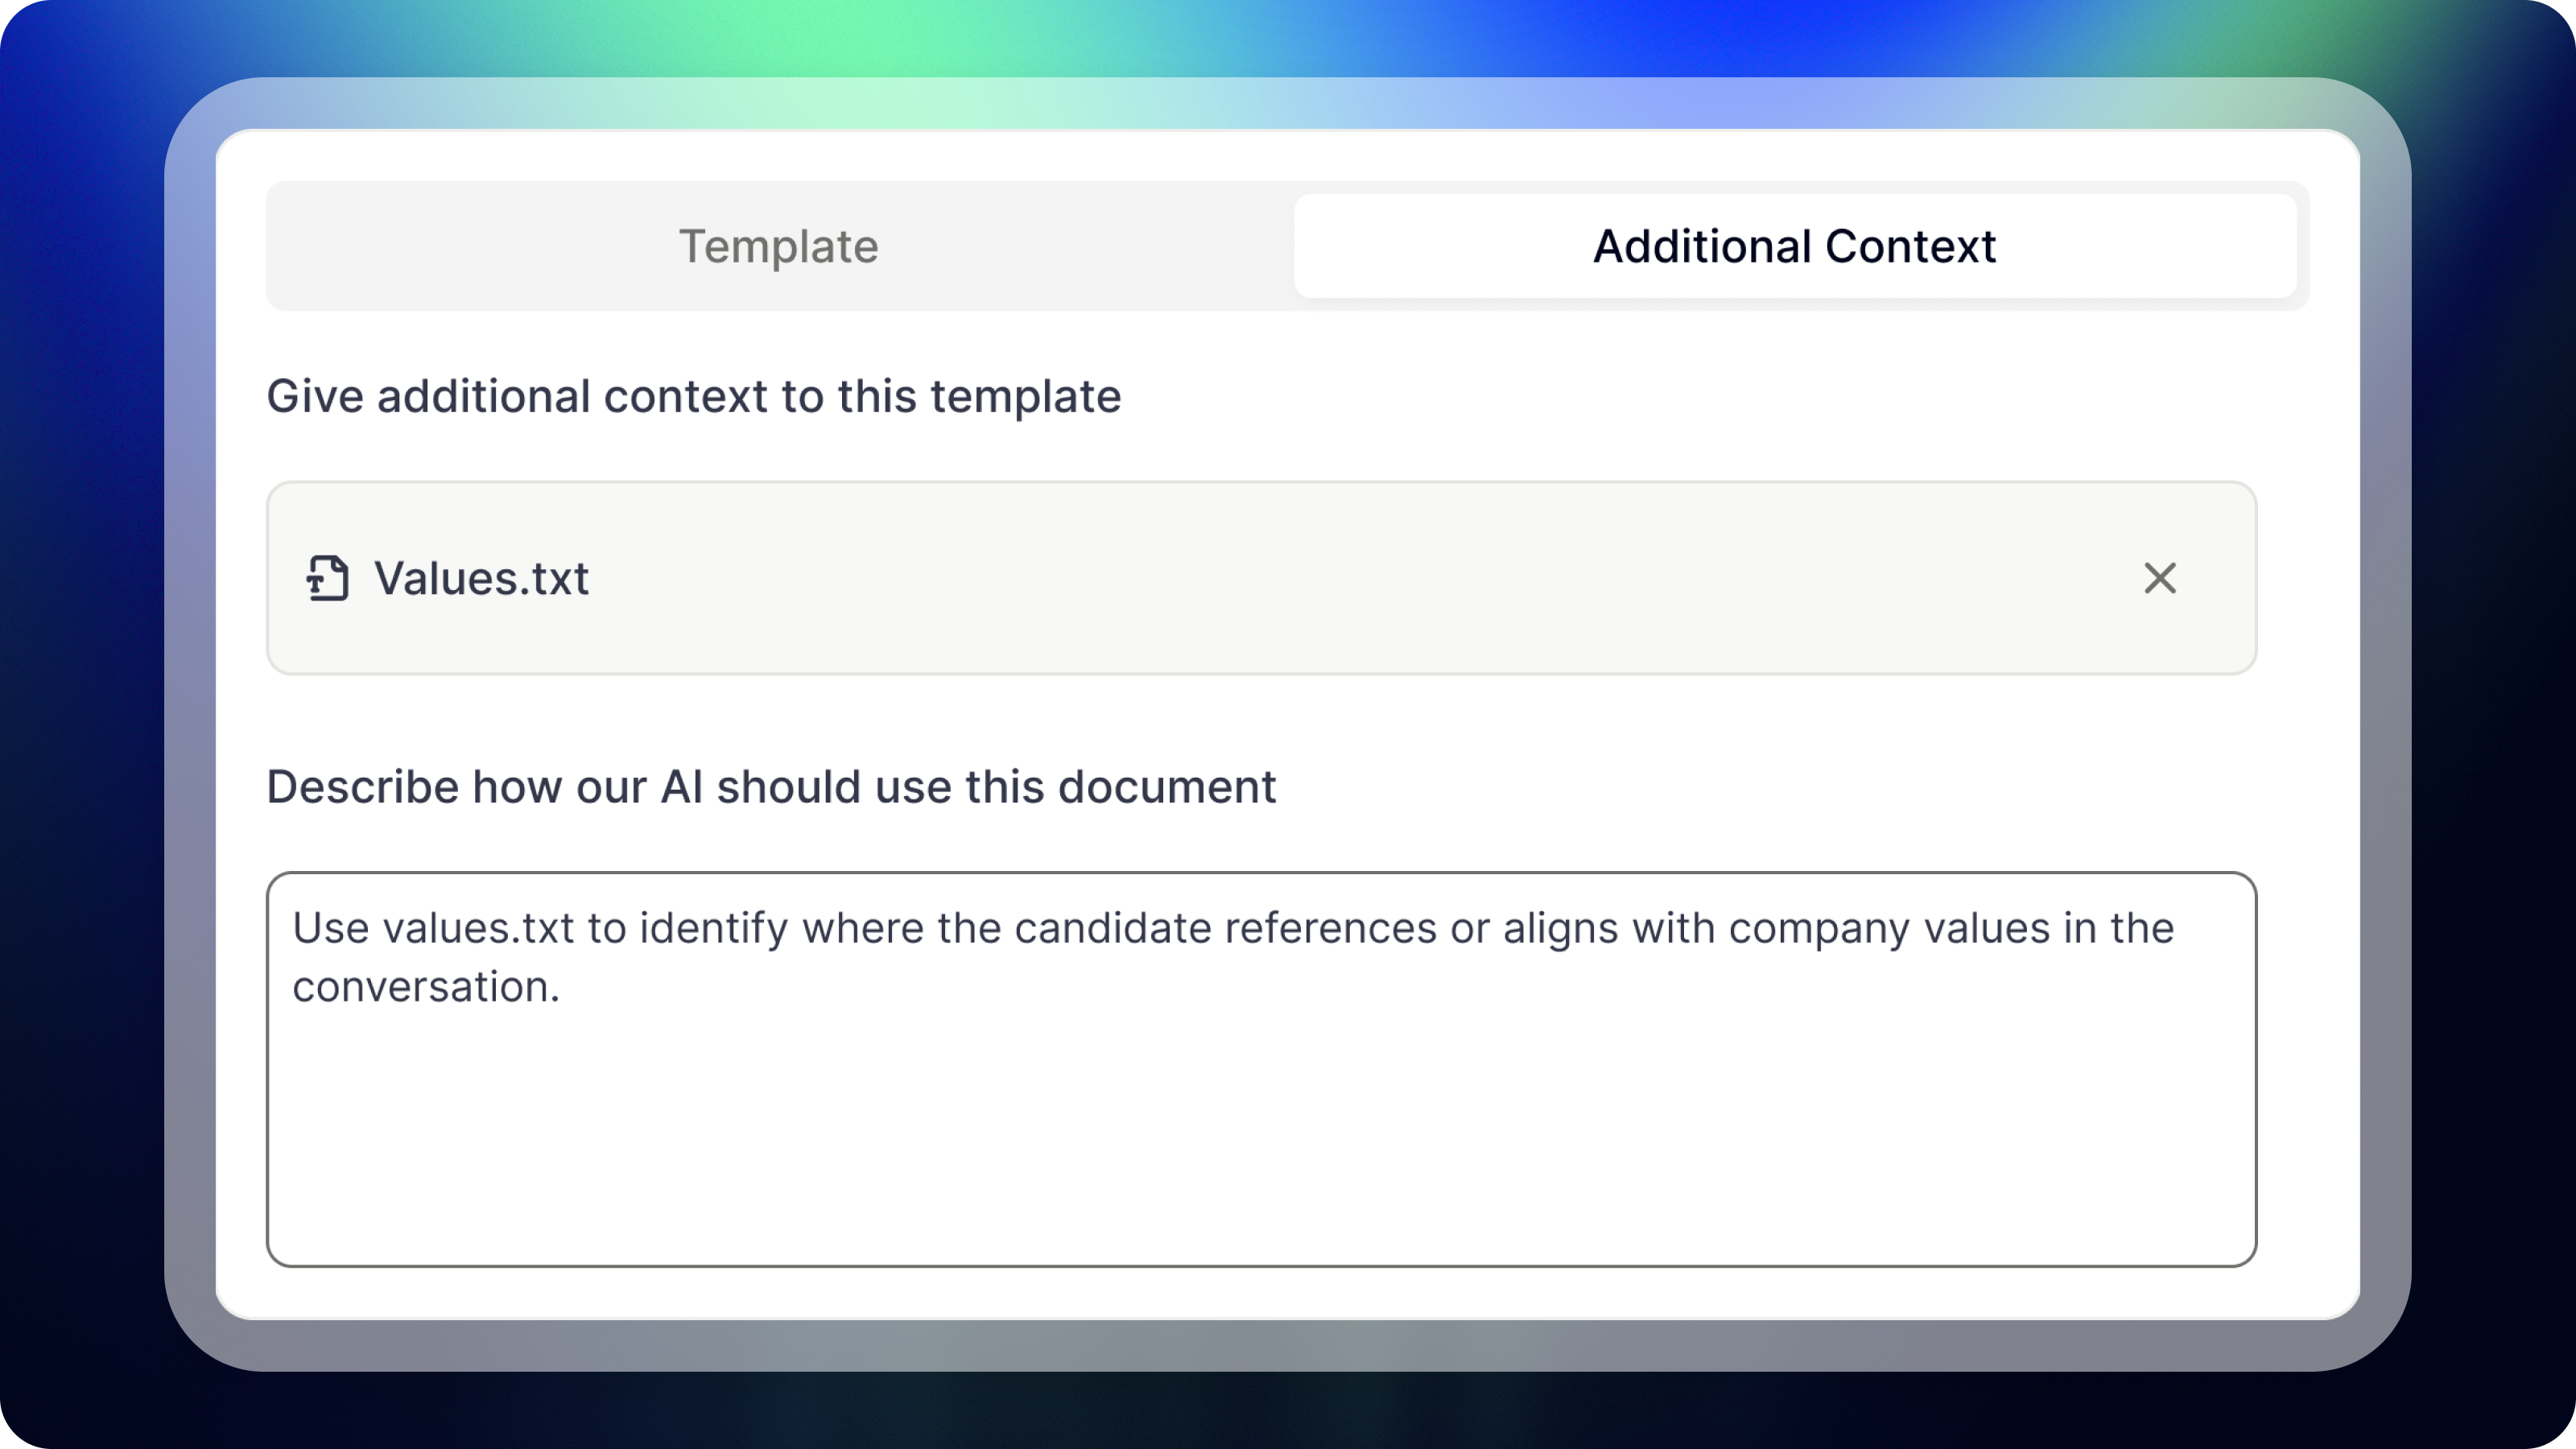
- Navigate to Your Template Editor: Once you’ve saved a template, click on
Additional Context. - Add Your Document: Within this tab, upload or paste the relevant text file you want to include as context. This can be as simple as pasting a job description or attaching a more detailed document.
- Describe How to Use This Document: After uploading the document, you’ll have the option to provide a description of how the document should be used by the AI. This is where you can explicitly tell the AI what to focus on or highlight.
- For example, if you uploaded a job description, you can instruct the AI to “List what the candidate said about the key responsibilities and skills in the job description.”
- If you uploaded company values, you could tell the AI to “Note any points where the candidate explicitly referred to one of our values, quoting what they said.”
- Importance of Referencing the Document in the Template: It’s essential to reference the uploaded document within your template itself to ensure that it plays an active role in shaping the final output.
- If you’ve uploaded a job description, create a section in your template titled “Key Requirements Met”, with a description like: “List out all the key requirements from the job description that the candidate addressed during the conversation.”
- If you’ve added company values, create a section titled “Values” with the description: “Give examples of when the candidate explicitly mentioned one of our core values.”
- For candidate feedback from previous interviews, create a “Follow-Up” section and prompt the AI to reference any areas of improvement that were discussed in the past and track the candidate’s progress.
Template context applies to every call the template is used on. To add context to one conversation only — a specific candidate’s CV, or an earlier call with them — add a source on the notes page instead. See Adding sources.
Organize your templates
Folders You can organize your templates into folders. To create a new folder, click on+ and New folder.
... next to your folder and select Rename.
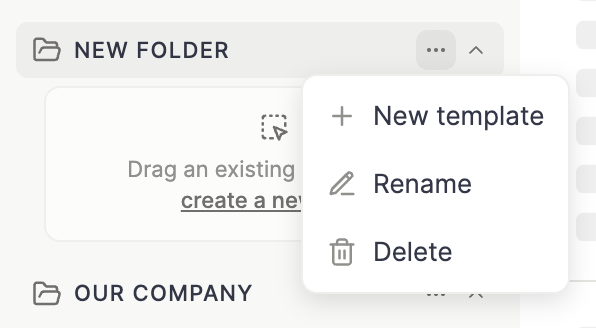
Delete the folder.
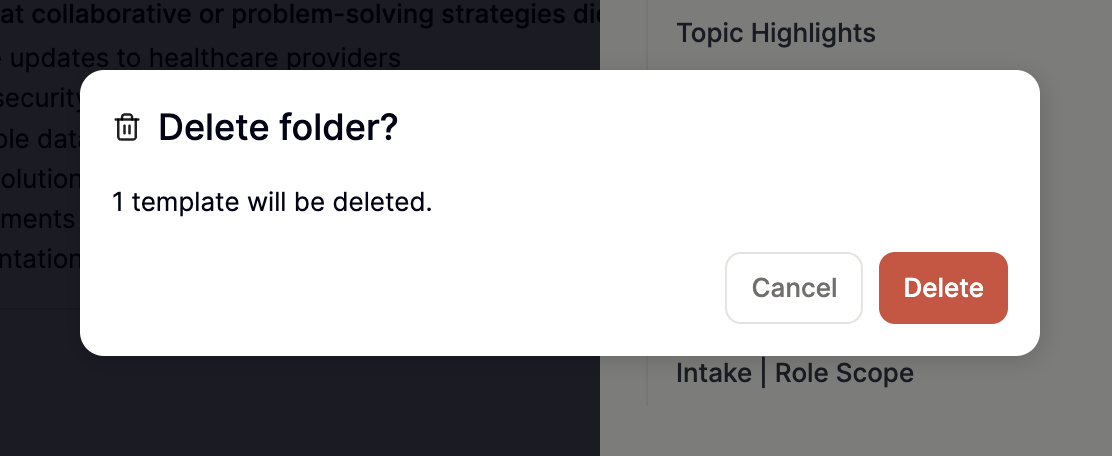
If you delete a folder, you will also delete all templates in that folder. The folder may have templates that were created by others.
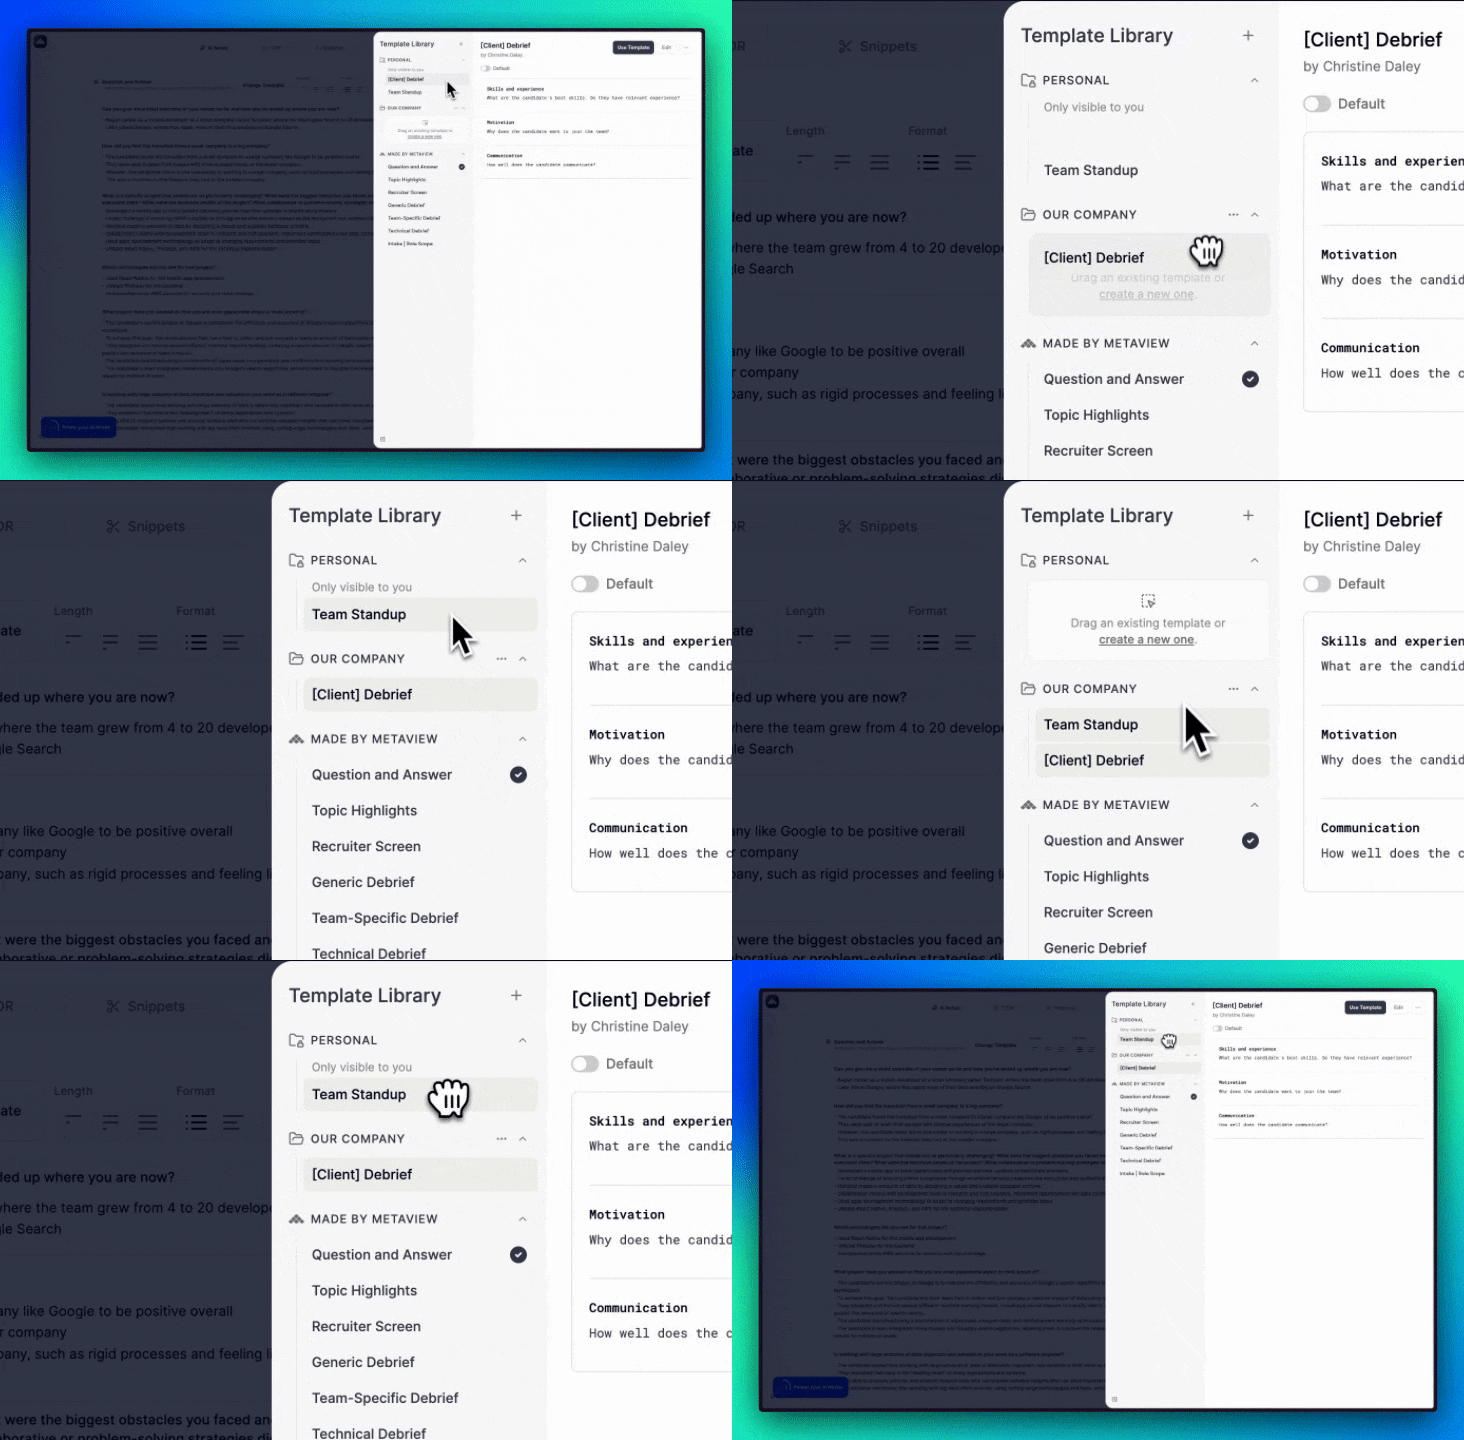
Share templates
Any template added to a folder other than your Personal folder becomes available to other users in your organization. Anyone with edit access can also view and continue its draft changes.If you want to restrict template permissions so that only admins can edit or delete shared templates, contact your Customer Success Manager to enable this setting for your organization.
Set a default template
You can choose a template and turn on theDefault toggle to make it the default for your own notes.
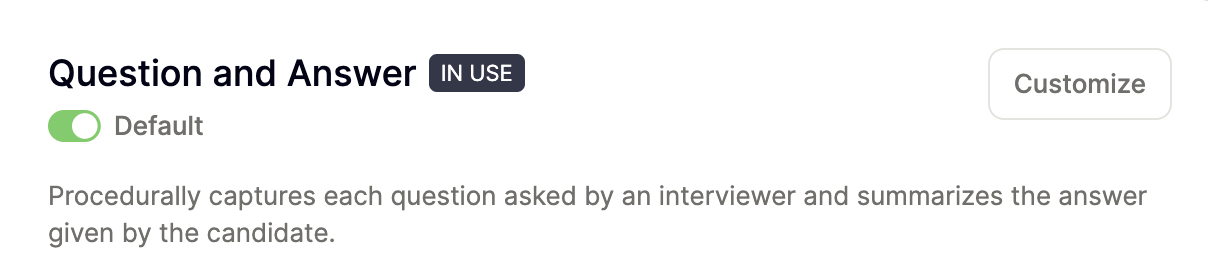
One thing to keep in mind: this does not automatically make the template the default for everyone in your workspace. If the template is still in your personal templates, only you can see and use it.
Apply a template automatically
If you want to be even more specific, you can control when this template is used based on certain conditions. For example, you might want a different template to apply automatically for debrief interviews or candidate screens. To do this, clickWhen to use, then Add rule. From there, choose a property—such as Event name—set the condition (for example, contains), and enter a value like debrief.
Once saved, this means the template will automatically be selected whenever the event name includes “debrief.” You can add as many rules as you need to make your template usage as tailored as possible.
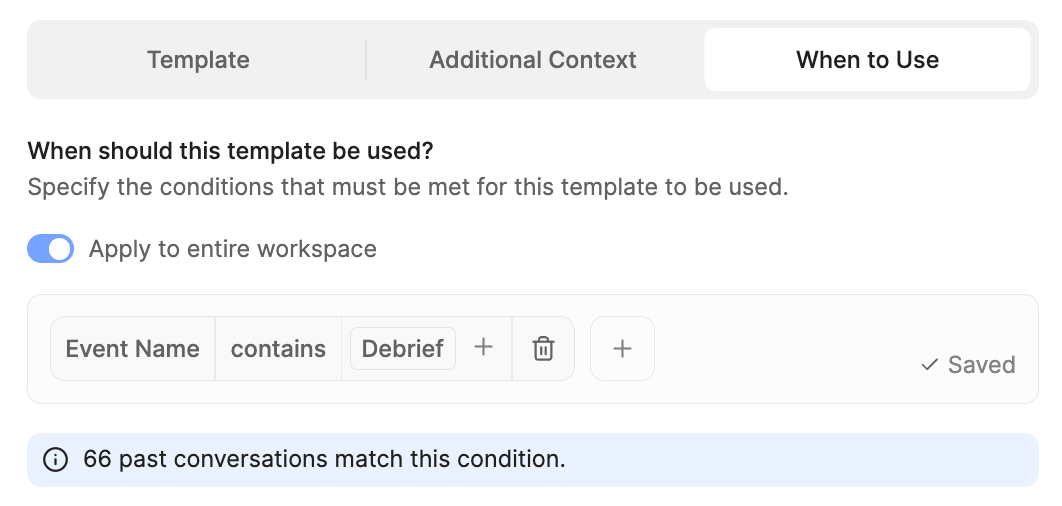
Apply to entire workspace. This will apply the template to new notes that match your rules; existing notes will keep their current format.
You can always come back later to edit or delete these rules if your conditions or processes change in the future.
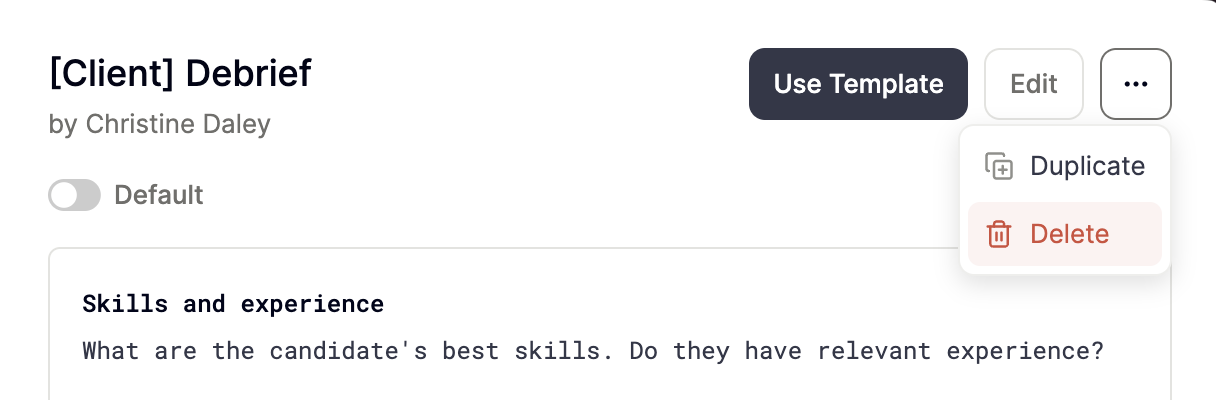
Delete a template
Selectthe template you want to delete. Click on the ... icon button, then Delete from the dropdown options. Please note that all users who have access to this template will also lose access to deleted templates.