Elyse shows you how to build custom templates.
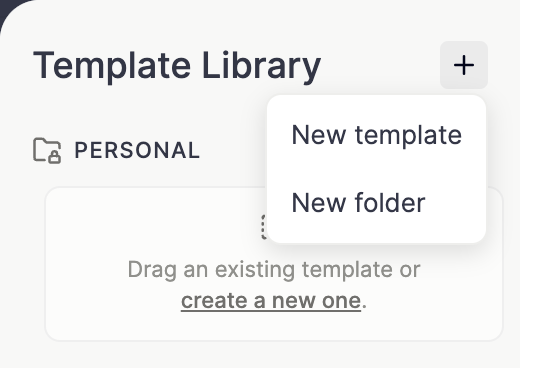
## Create a new template Once you have captured a call with Metaview and viewing your notes, click on `Use template` to access your Template Library. If you are viewing your notes on the legacy version, click on `Change Template` instead. To create a template from scratch click on `+` and select `New Template` in the dropdown.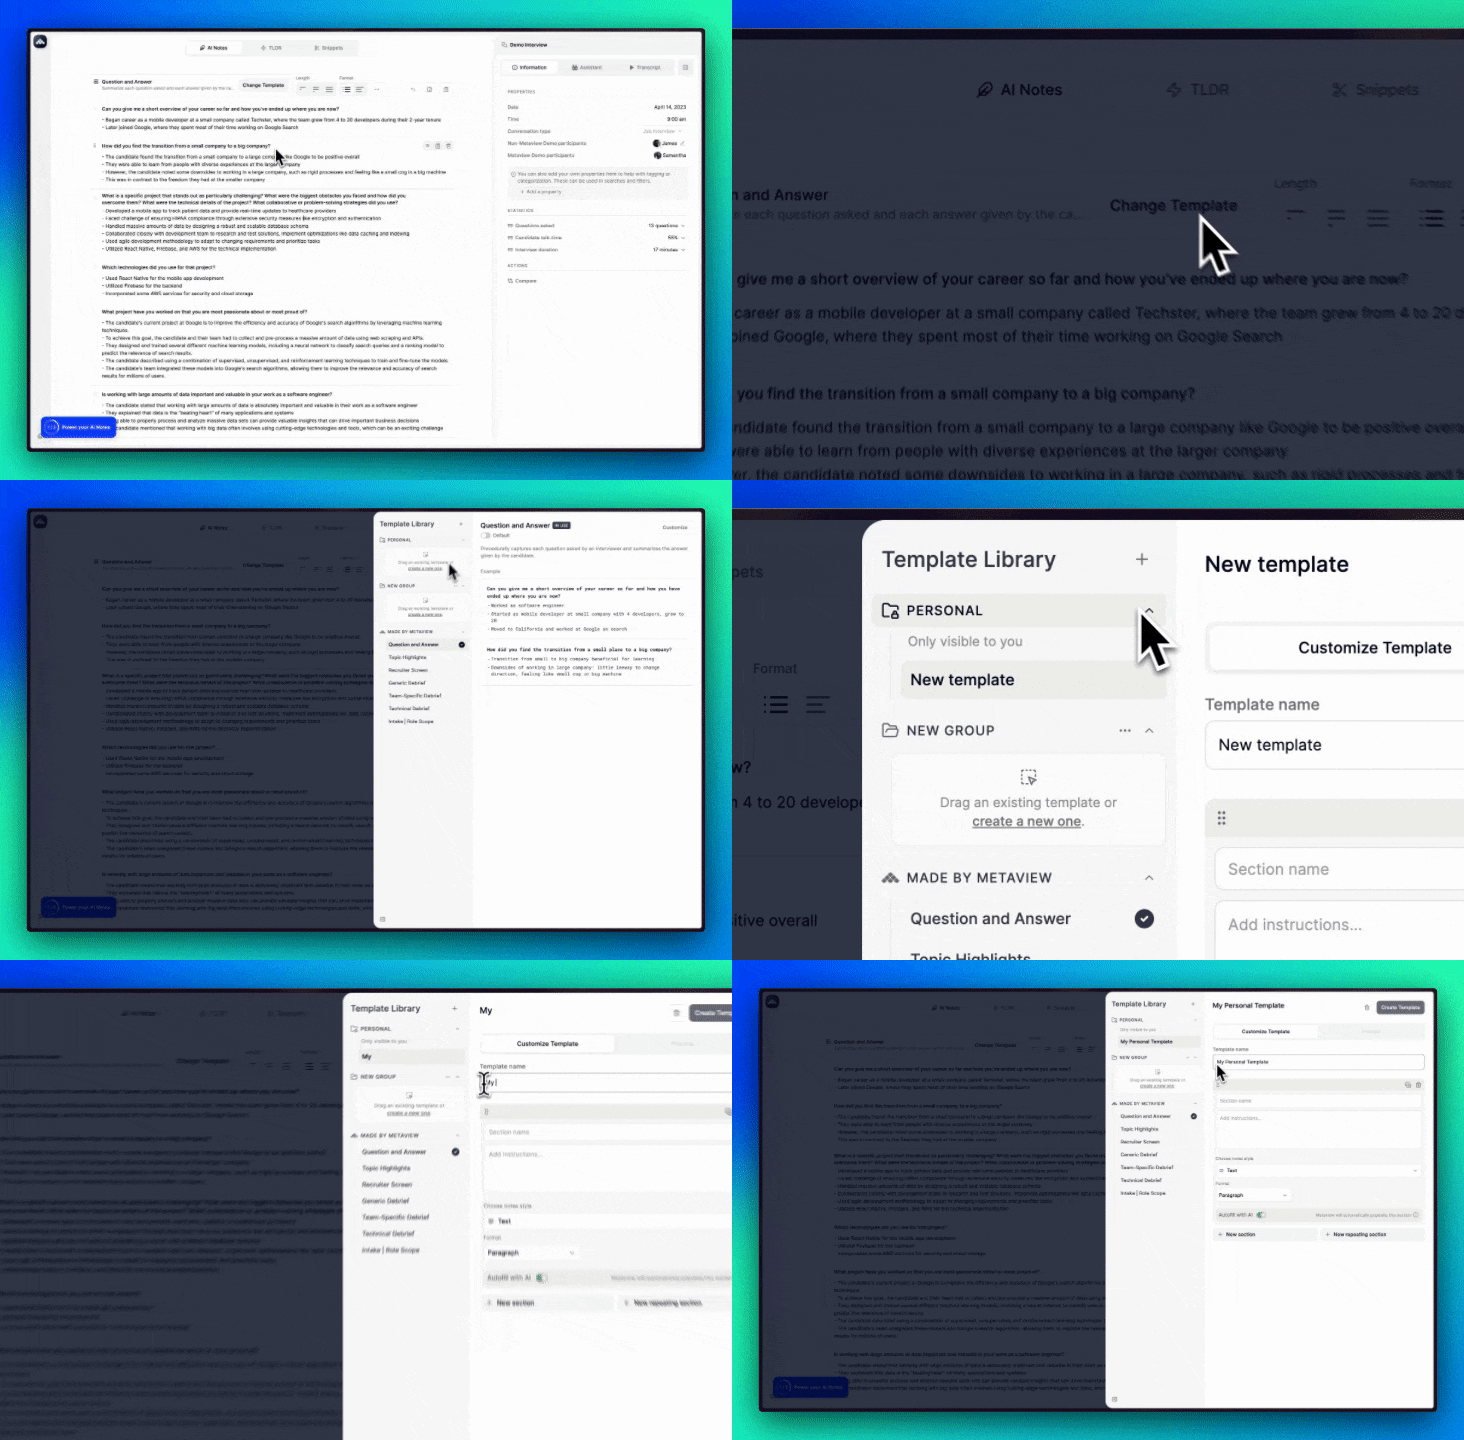 ## Customize existing templates
You can select an existing template and click `Edit` to make changes, or click on a template under `Made by Metaview`, and then `Customize`.
## Customize existing templates
You can select an existing template and click `Edit` to make changes, or click on a template under `Made by Metaview`, and then `Customize`.
 ## Building Your Template
**Notes sections**
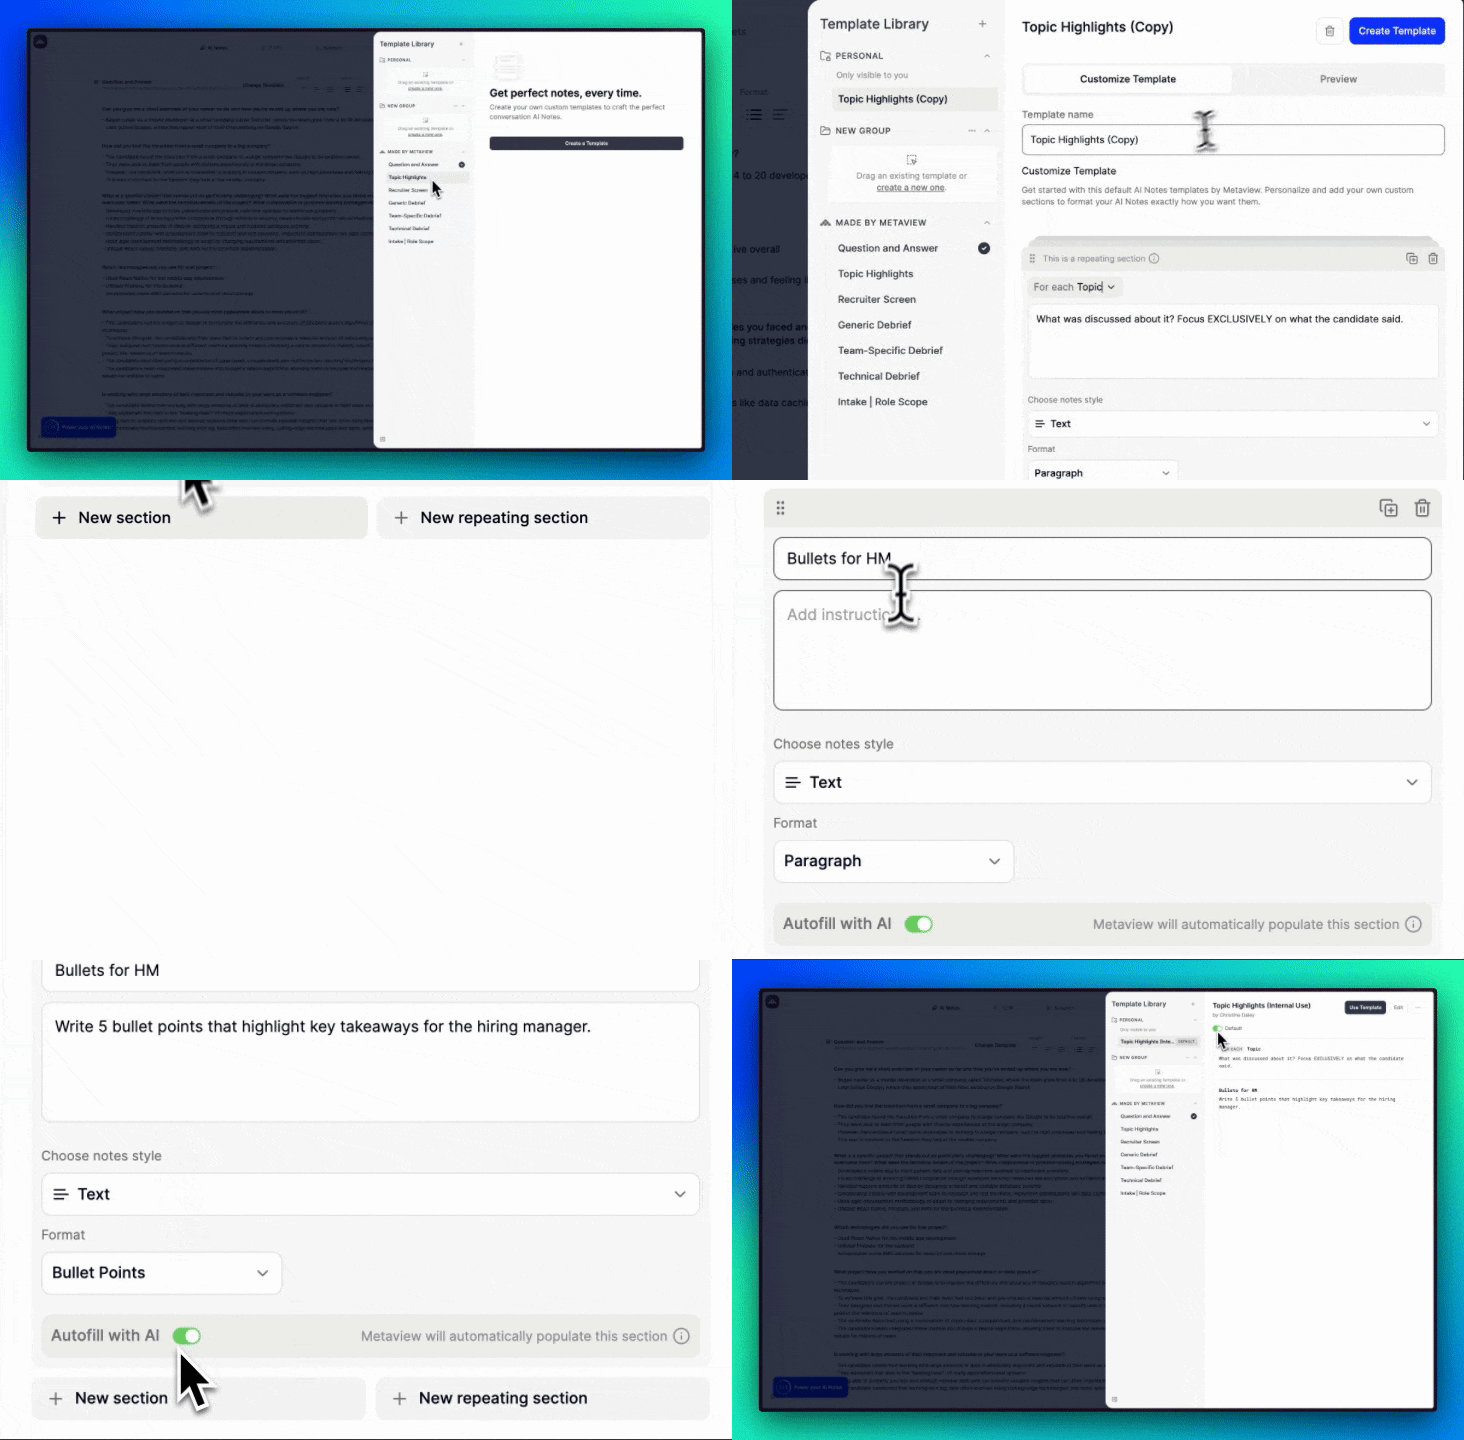
Templates are organized by the notes sections. Each section will need a section header and instructions you want to give to Metaview AI, or for yourself and others on what to write/include. You can also le AI do more of the heavy lifting and get higher quality output from your conversation data — just type what you want the output to be in each section, and click `Improve Prompt`.
## Building Your Template
**Notes sections**
Templates are organized by the notes sections. Each section will need a section header and instructions you want to give to Metaview AI, or for yourself and others on what to write/include. You can also le AI do more of the heavy lifting and get higher quality output from your conversation data — just type what you want the output to be in each section, and click `Improve Prompt`.
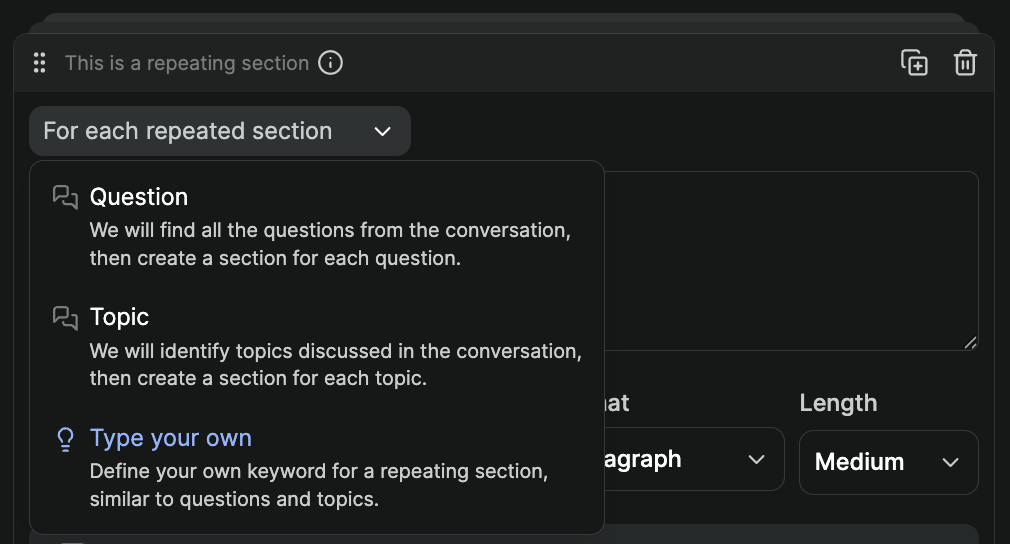 For this, Metaview provides the ability to configure a repeating section which takes the structure `For Each X`, e.g. *For each Topic, outline what was discussed focusing mainly on what was said by the candidate*. Metaview will then produce one section for each `Topic` or `Your own keyword` in your AI Notes. You can also create your own repeating section by picking `Type your own` and enter what you want the section to repeat on.
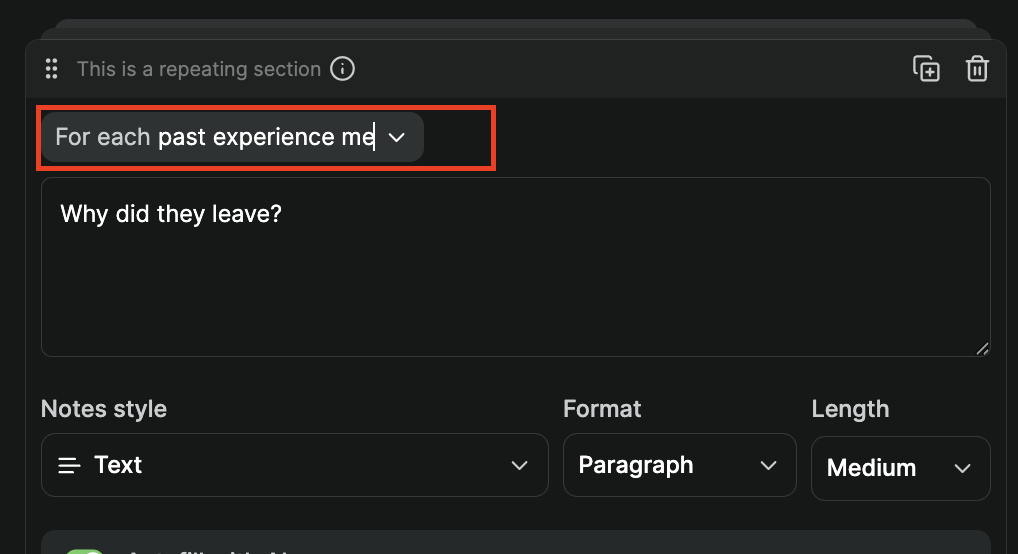 You can rearrange sections by dragging them up or down within the editor. You can also delete a section by clicking on the `🗑️` (trashbin) icon.
**Preview template**
Click on `Preview` to see how your new template would work with your currently selected call.
You can rearrange sections by dragging them up or down within the editor. You can also delete a section by clicking on the `🗑️` (trashbin) icon.
**Preview template**
Click on `Preview` to see how your new template would work with your currently selected call.
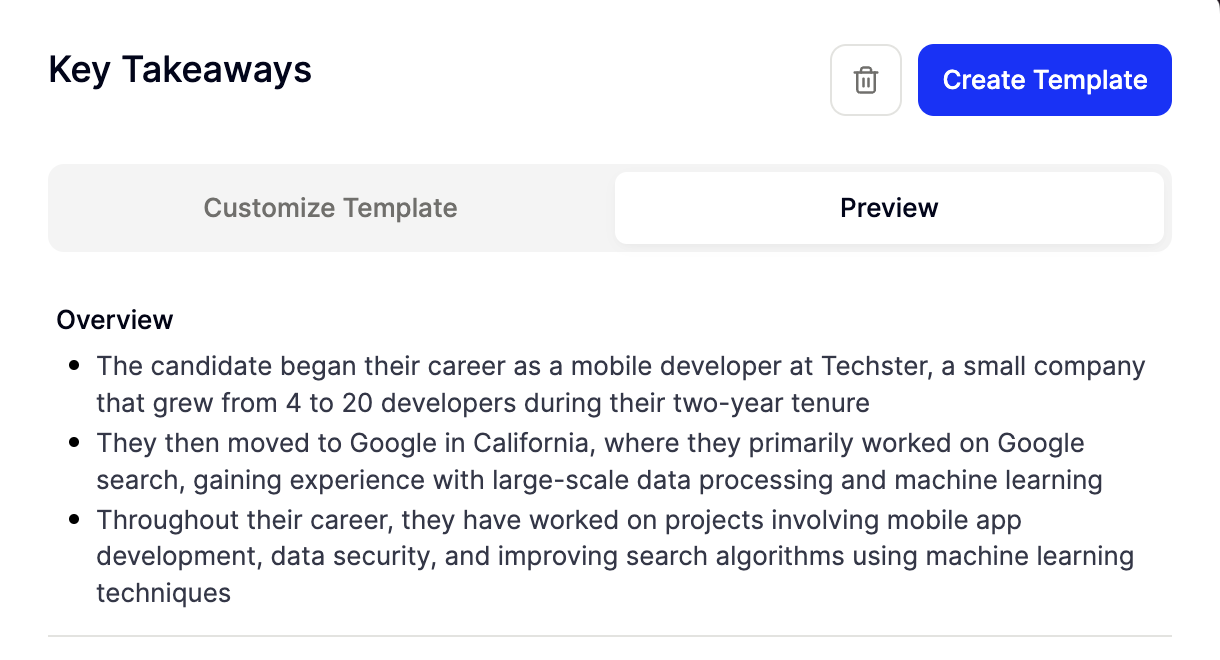 If you're happy with the preview results, click on `Create Template` to save your new template. Otherwise, you can click back on `Customize Template` to continue building or editing your template.
## Adding context
When creating a custom template in Metaview, you can enhance it by including additional context. This feature allows you to provide crucial background information for more accurate AI-generated outputs. Whether it’s a **job description**, **company values**, or **past notes on a candidate**, adding context ensures that the AI understands the bigger picture and incorporates relevant details into the template.
If you're happy with the preview results, click on `Create Template` to save your new template. Otherwise, you can click back on `Customize Template` to continue building or editing your template.
## Adding context
When creating a custom template in Metaview, you can enhance it by including additional context. This feature allows you to provide crucial background information for more accurate AI-generated outputs. Whether it’s a **job description**, **company values**, or **past notes on a candidate**, adding context ensures that the AI understands the bigger picture and incorporates relevant details into the template.
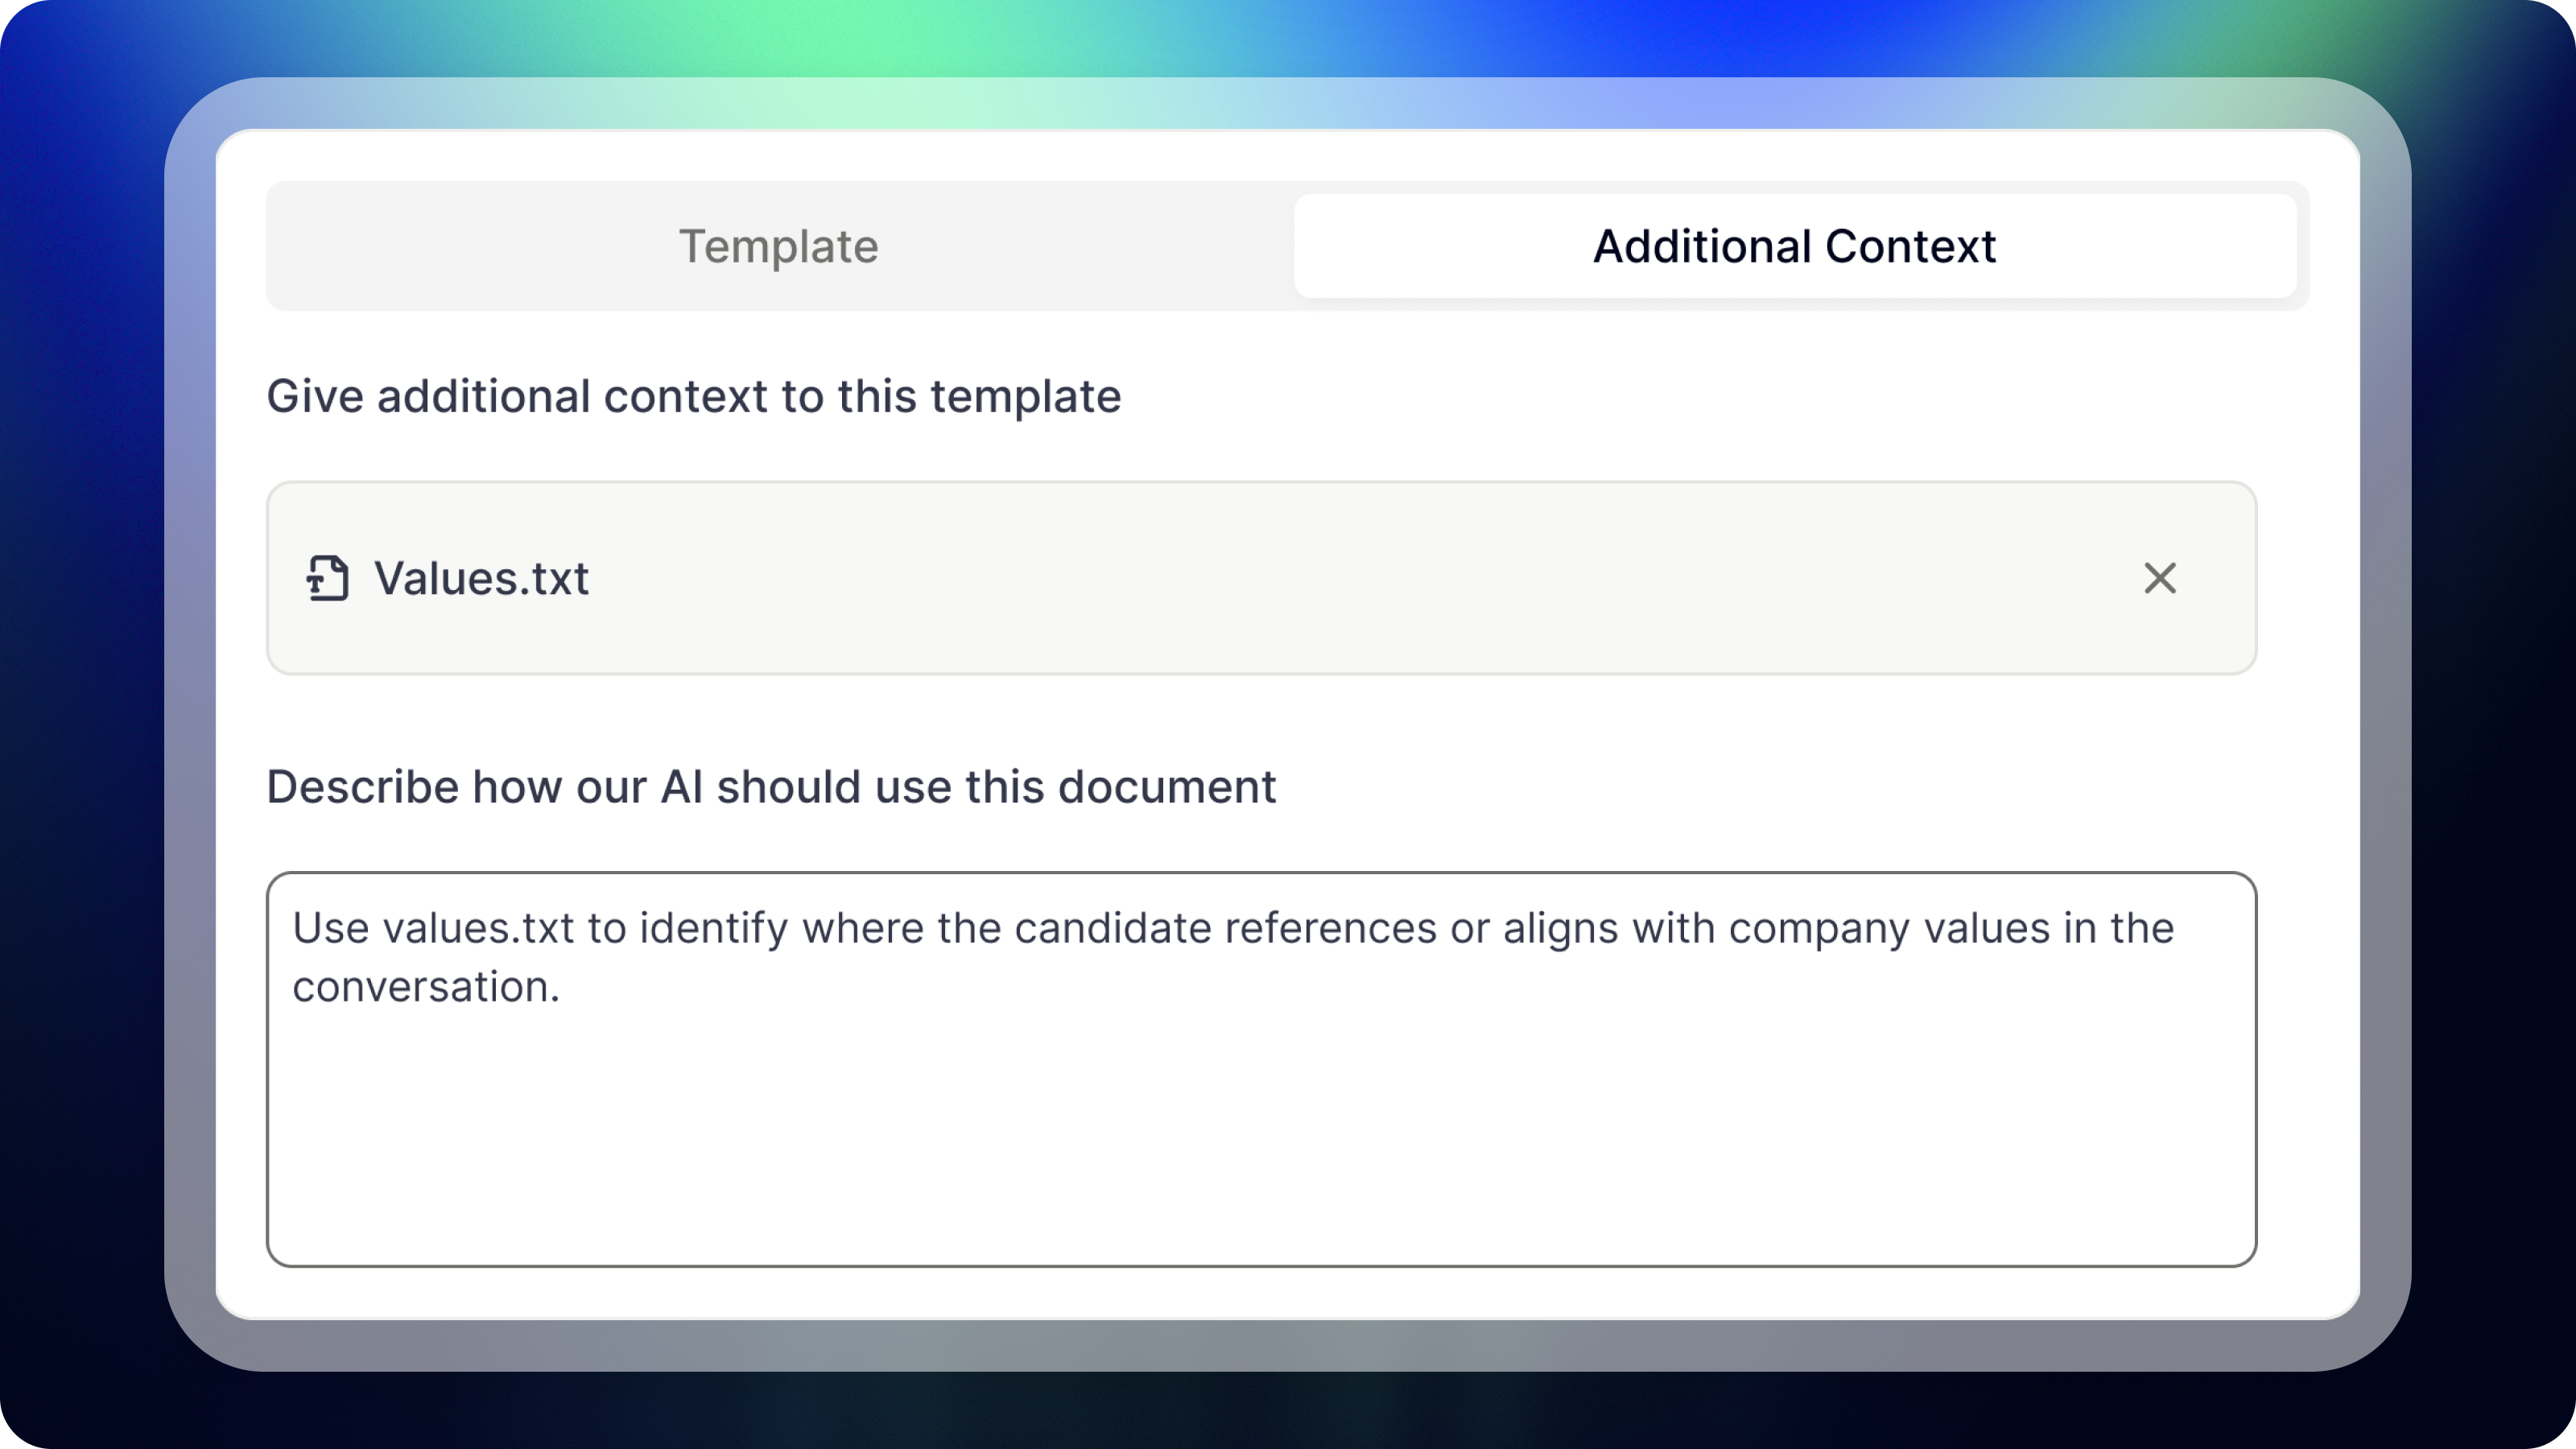 **How to Use the Additional Context Feature**
1. **Navigate to Your Template Editor**: Once you’ve saved a template, click on `Additional Context`.
2. **Add Your Document**: Within this tab, upload or paste the relevant text file you want to include as context. This can be as simple as pasting a job description or attaching a more detailed document.
3. **Describe How to Use This Document**: After uploading the document, you’ll have the option to provide a description of how the document should be used by the AI. This is where you can explicitly tell the AI what to focus on or highlight.
* For example, if you uploaded a **job description**, you can instruct the AI to “Evaluate how the candidate’s experience matches the key responsibilities and skills listed.”
* If you uploaded **company values**, you could tell the AI to “Look for instances where the candidate demonstrates alignment with our values, either explicitly or through implied actions.”
4. **Importance of Referencing the Document in the Template**: It’s essential to reference the uploaded document within your template itself to ensure that it plays an active role in shaping the final output.
* If you’ve uploaded a **job description**, create a section in your template titled **“Key Requirements Met”**, with a description like: “List out all the key requirements from the job description that the candidate addressed during the conversation.”
* If you’ve added **company values**, create a section titled **“Values”** with the description: “Give examples of when the candidate explicitly mentioned or alluded to our core values.”
* For **candidate feedback** from previous interviews, create a **“Follow-Up”** section and prompt the AI to reference any areas of improvement that were discussed in the past and track the candidate’s progress.
## Organize Your Templates
**Folders**
You can organize your templates into folders. To create a new folder, click on `+` and `New folder`.
**How to Use the Additional Context Feature**
1. **Navigate to Your Template Editor**: Once you’ve saved a template, click on `Additional Context`.
2. **Add Your Document**: Within this tab, upload or paste the relevant text file you want to include as context. This can be as simple as pasting a job description or attaching a more detailed document.
3. **Describe How to Use This Document**: After uploading the document, you’ll have the option to provide a description of how the document should be used by the AI. This is where you can explicitly tell the AI what to focus on or highlight.
* For example, if you uploaded a **job description**, you can instruct the AI to “Evaluate how the candidate’s experience matches the key responsibilities and skills listed.”
* If you uploaded **company values**, you could tell the AI to “Look for instances where the candidate demonstrates alignment with our values, either explicitly or through implied actions.”
4. **Importance of Referencing the Document in the Template**: It’s essential to reference the uploaded document within your template itself to ensure that it plays an active role in shaping the final output.
* If you’ve uploaded a **job description**, create a section in your template titled **“Key Requirements Met”**, with a description like: “List out all the key requirements from the job description that the candidate addressed during the conversation.”
* If you’ve added **company values**, create a section titled **“Values”** with the description: “Give examples of when the candidate explicitly mentioned or alluded to our core values.”
* For **candidate feedback** from previous interviews, create a **“Follow-Up”** section and prompt the AI to reference any areas of improvement that were discussed in the past and track the candidate’s progress.
## Organize Your Templates
**Folders**
You can organize your templates into folders. To create a new folder, click on `+` and `New folder`.
 Rename your folder by clicking on the `...` next to your folder and select `Rename`.
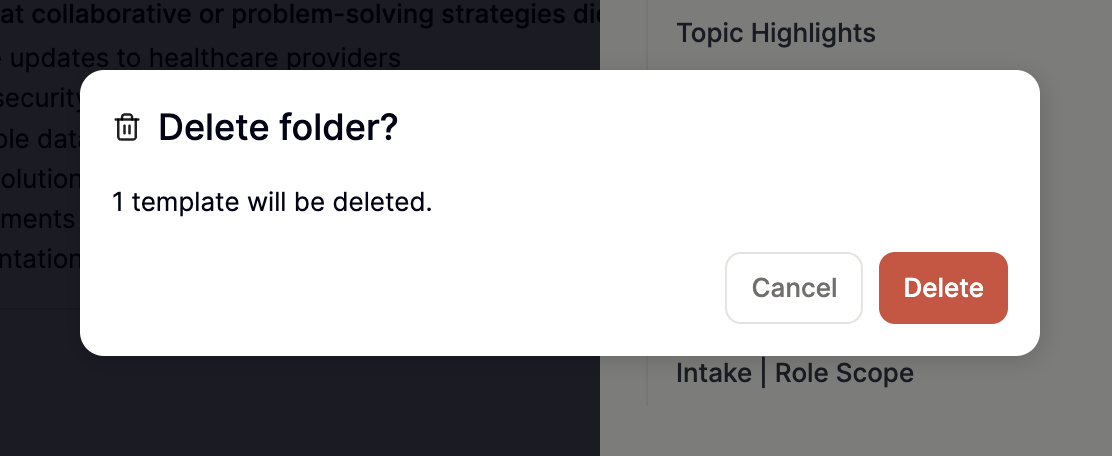
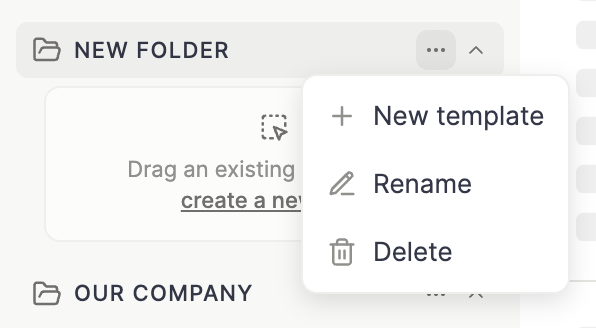 You can also `Delete` the folder.
 ## Set Default Template
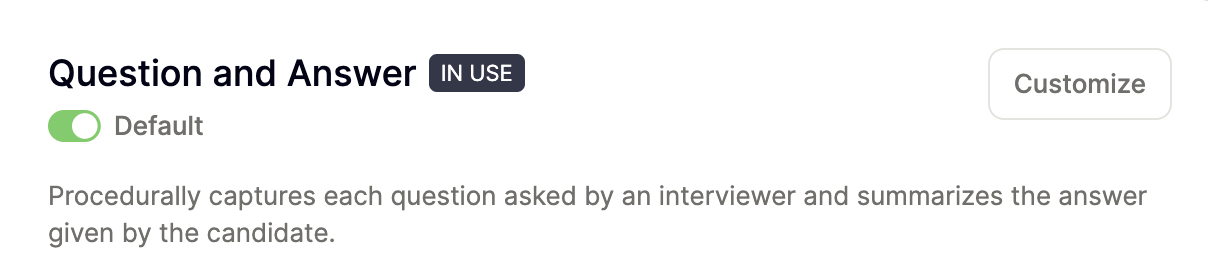
Select the template you want and enable the `Default` toggle.
## Set Default Template
Select the template you want and enable the `Default` toggle.
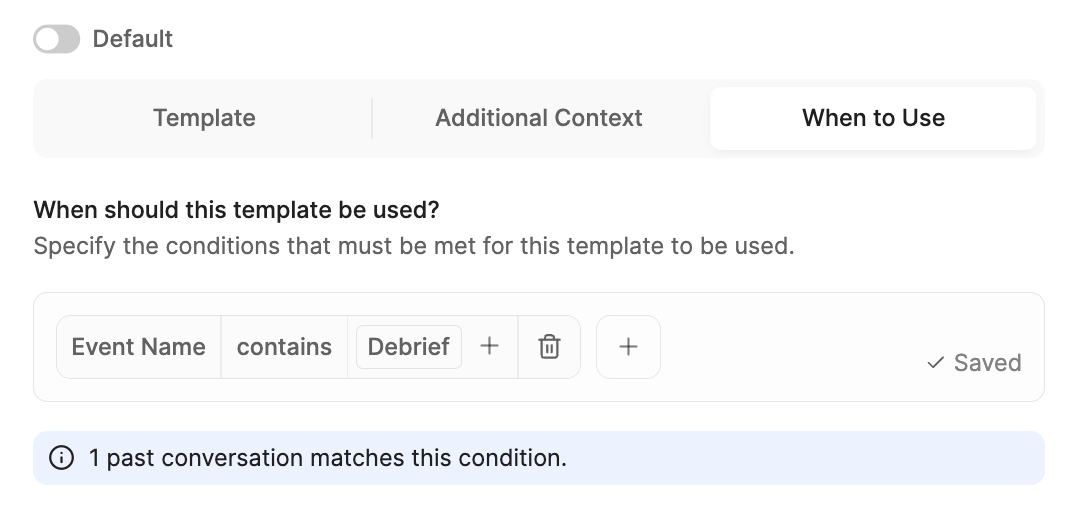
 If you want to be even more specific, you can control *when* this template is used based on certain conditions. For example, you might want a different template to apply automatically for debrief interviews or candidate screens. To do this, click `When to use`, then `Add rule`. From there, choose a property—such as **Event name**—set the condition (for example, *contains*), and enter a value like *debrief*.
Once saved, this means the template will automatically be selected whenever the event name includes “debrief.” You can add as many rules as you need to make your template usage as tailored as possible.
If you want to be even more specific, you can control *when* this template is used based on certain conditions. For example, you might want a different template to apply automatically for debrief interviews or candidate screens. To do this, click `When to use`, then `Add rule`. From there, choose a property—such as **Event name**—set the condition (for example, *contains*), and enter a value like *debrief*.
Once saved, this means the template will automatically be selected whenever the event name includes “debrief.” You can add as many rules as you need to make your template usage as tailored as possible.
 You can always come back later to **edit** or **delete** these rules if your conditions or processes change in the future.
## Share Templates
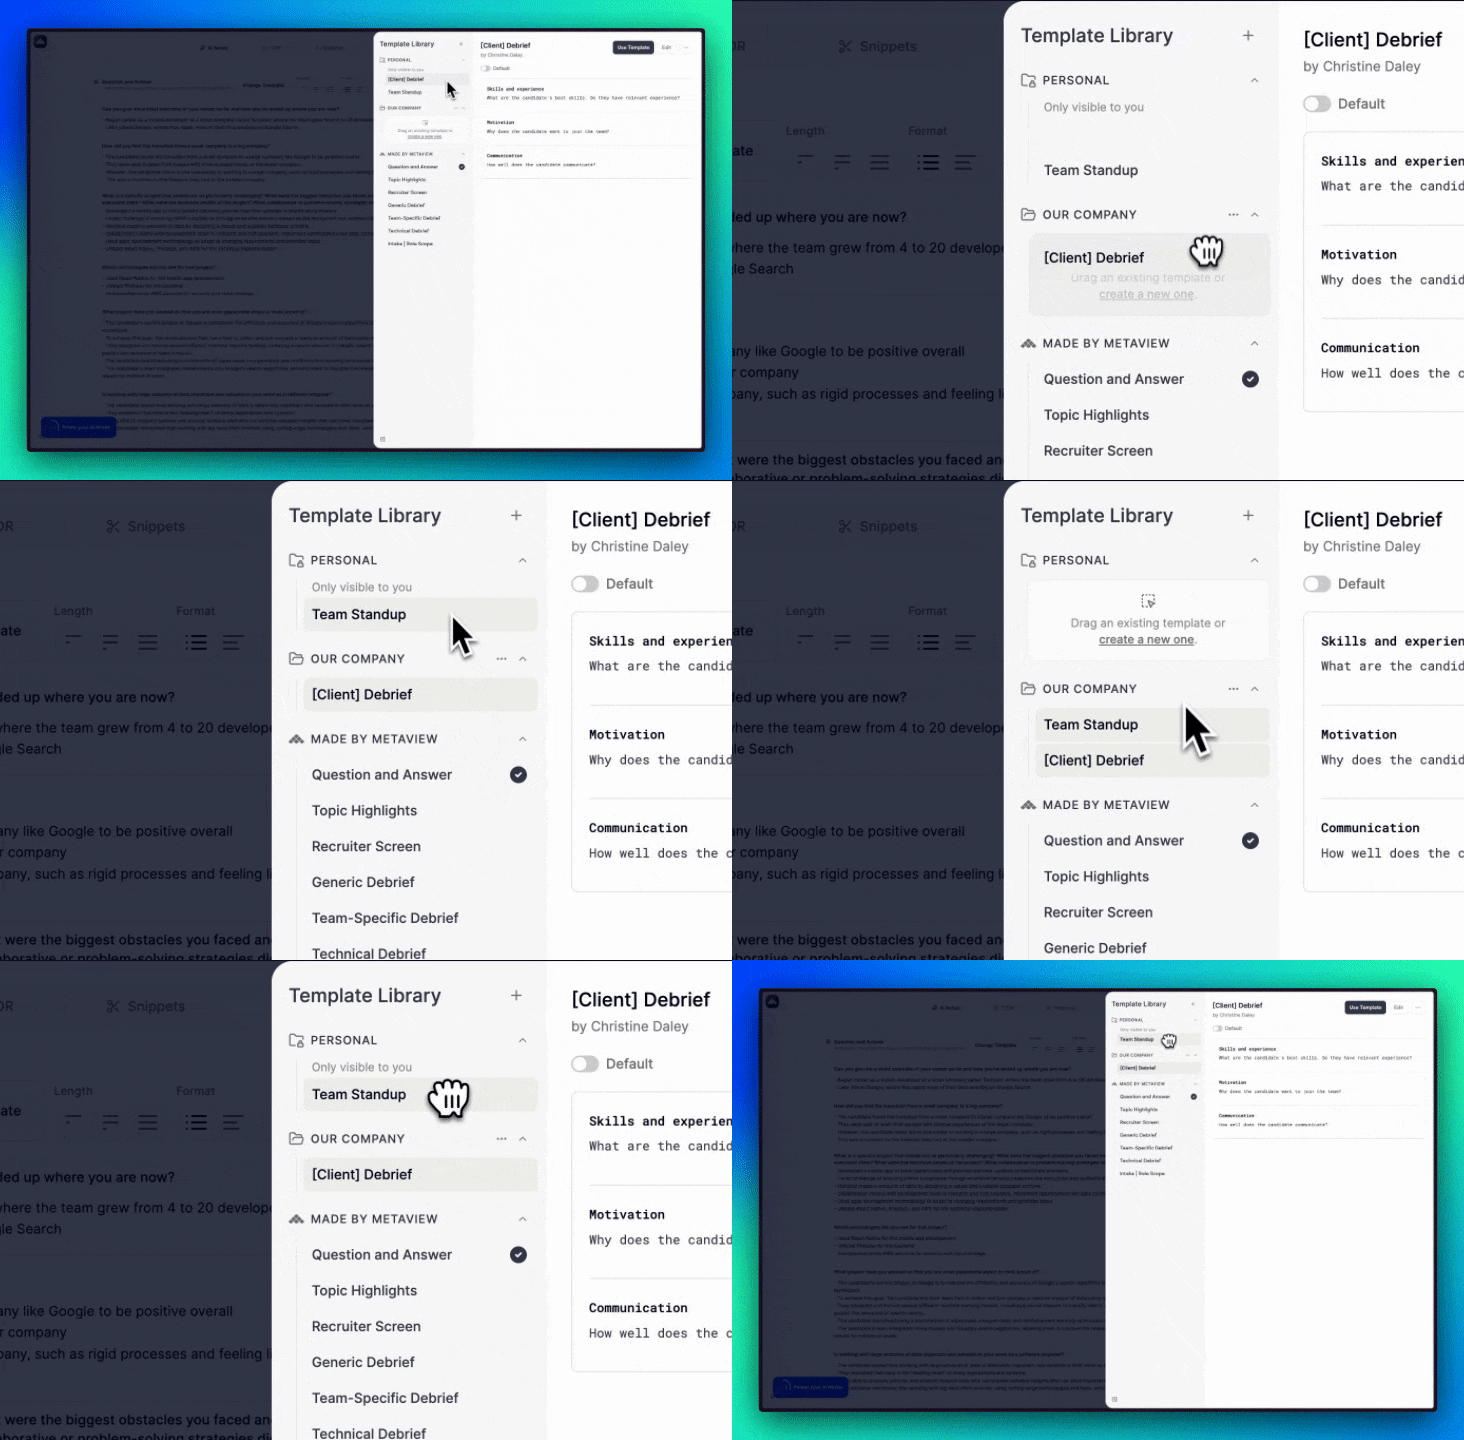
Any template that is added to a folder, other than your Personal folder, becomes available to all other users at your organization. Templates in shared folders can be edited or deleted **by any user at your organization**.
## Delete Template
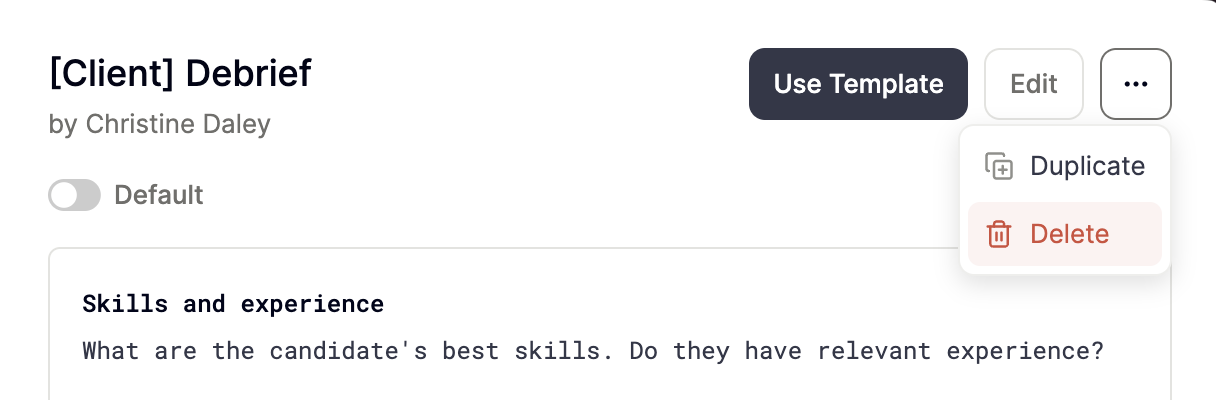
Select `the template you want to delete`. Click on the `...` icon button, then `Delete` from the dropdown options. Please note that all users who have access to this template **will also lose access to deleted templates**.
You can always come back later to **edit** or **delete** these rules if your conditions or processes change in the future.
## Share Templates
Any template that is added to a folder, other than your Personal folder, becomes available to all other users at your organization. Templates in shared folders can be edited or deleted **by any user at your organization**.
## Delete Template
Select `the template you want to delete`. Click on the `...` icon button, then `Delete` from the dropdown options. Please note that all users who have access to this template **will also lose access to deleted templates**.