> ## Documentation Index
> Fetch the complete documentation index at: https://support.metaview.ai/llms.txt
> Use this file to discover all available pages before exploring further.
# Record With the Desktop App
> Record calls and in-person conversations without adding a bot to the meeting
The Metaview desktop app records microphone and computer audio without adding a bot participant to the meeting. Use it for video calls where a bot is not the right fit, or for ad hoc and in-person conversations. Your transcript and notes appear in Metaview as usual.
Desktop recording must be enabled for your workspace. If you do not see `Download desktop app` in your Metaview menu after signing in, ask your workspace admin or [contact support](mailto:support@metaview.ai).
## Before you start
**Supported computers**
* **Mac** — Apple Silicon Mac running macOS 14.2 or later
* **Windows** — Windows 10 or later on an x64 computer
Desktop recordings are **audio only**. Metaview captures your microphone and the audio playing from your computer, but it does not capture video, screen sharing, or meeting chat.
## Install the app
Open your user menu in Metaview and select `Download desktop app`, or go to [metaview.ai/download](https://www.metaview.ai/download). The page supplies the correct installer for your computer.
On a Mac, open the DMG and drag Metaview into Applications. On Windows, run the installer. Then open Metaview and sign in with your usual Metaview account.
Connect your calendar if prompted. Your calendar lets the app show upcoming meetings, but opening the app never starts a recording.
Complete each permission step shown in the app. On a Mac, you may need to restart Metaview after granting access, and the app may also prompt you to restart Zoom.
## Start and stop a recording
Recording always requires your click. The app never starts recording automatically.
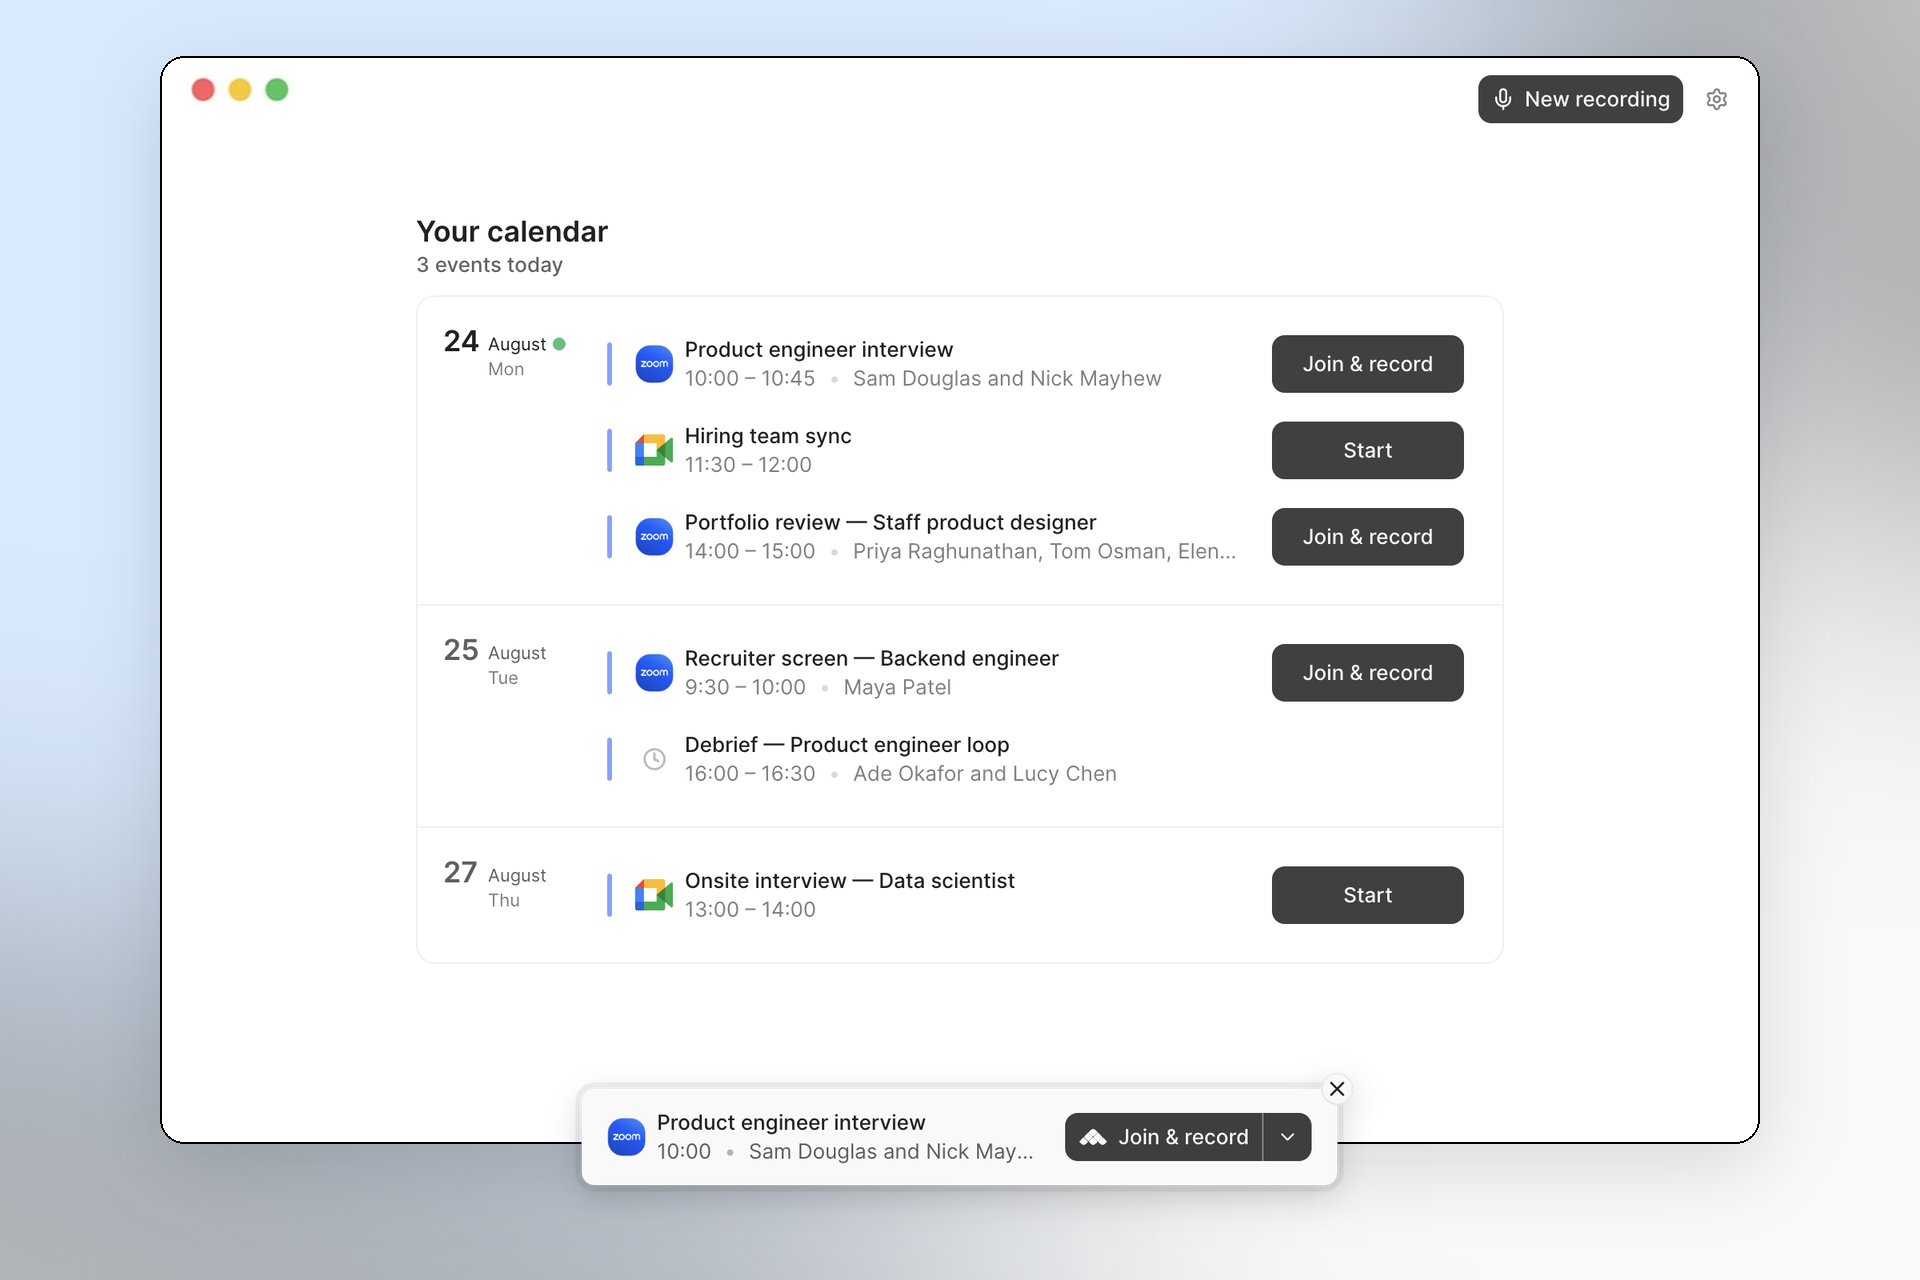 For a scheduled video call, select `Join & record` to open the meeting and prepare the recording, or select `Start` for a calendar event that does not have a meeting link. If Metaview detects a call you joined another way, its prompt offers `Record`.
For an ad hoc or in-person conversation, select `New recording` in the top-right of the app. Ad hoc recordings may not include participant names, so you may need to [assign or correct speakers](/notes/participants) after processing.
Check for the recording indicator and the running timer. You can hide the floating recording bar without stopping the recording.
Keep your computer audio unmuted and Metaview running. During a video call, keep the meeting window and participant tiles visible where possible — a minimized or hidden meeting can make speaker identification less accurate.
Select `Stop` when the conversation ends. Keep Metaview open until the upload finishes. The app then processes the transcript and notes in the background.
Metaview notifies you when the conversation is ready. Select `Open Notes` or `Open conversation`, or open it from the matching calendar event in the desktop app.
## Tell participants that you are recording
You are responsible for telling participants and respecting their recording preferences. We recommend notifying them before the meeting and confirming again when the call starts. See [Notifications](/account-management/privacy-and-security/notifications) for guidance.
On a Mac, `Announce recording in chat` is on by default for Google Meet in Chrome, the Zoom desktop app, and the Microsoft Teams desktop app. You can change it in the desktop app's settings unless your workspace requires it. Your workspace can also use custom wording.
Chat announcements are not supported on Windows. On a Mac, an enabled announcement is not a guarantee that a message reached the meeting chat. Always tell participants yourself when the message is unavailable or cannot be confirmed.
## If a bot is also on the call
You can leave the Metaview bot enabled while trying the desktop app. If both capture the same conversation, Metaview normally keeps one set of notes from the more complete recording, preferring the bot when coverage is equivalent.
Only one person in a workspace can record the same meeting with the desktop app. If a colleague is already recording it, the app tells you instead of starting a second desktop recording.
Desktop recordings use the same Metaview access, sharing, retention, and deletion controls as other conversations. See [Privacy and Security](/account-management/privacy-and-security/overview) and [Access and permissions](/notes/access).
This documentation is built and hosted on [Mintlify](https://mintlify.com), a developer documentation platform.
For a scheduled video call, select `Join & record` to open the meeting and prepare the recording, or select `Start` for a calendar event that does not have a meeting link. If Metaview detects a call you joined another way, its prompt offers `Record`.
For an ad hoc or in-person conversation, select `New recording` in the top-right of the app. Ad hoc recordings may not include participant names, so you may need to [assign or correct speakers](/notes/participants) after processing.
Check for the recording indicator and the running timer. You can hide the floating recording bar without stopping the recording.
Keep your computer audio unmuted and Metaview running. During a video call, keep the meeting window and participant tiles visible where possible — a minimized or hidden meeting can make speaker identification less accurate.
Select `Stop` when the conversation ends. Keep Metaview open until the upload finishes. The app then processes the transcript and notes in the background.
Metaview notifies you when the conversation is ready. Select `Open Notes` or `Open conversation`, or open it from the matching calendar event in the desktop app.
## Tell participants that you are recording
You are responsible for telling participants and respecting their recording preferences. We recommend notifying them before the meeting and confirming again when the call starts. See [Notifications](/account-management/privacy-and-security/notifications) for guidance.
On a Mac, `Announce recording in chat` is on by default for Google Meet in Chrome, the Zoom desktop app, and the Microsoft Teams desktop app. You can change it in the desktop app's settings unless your workspace requires it. Your workspace can also use custom wording.
Chat announcements are not supported on Windows. On a Mac, an enabled announcement is not a guarantee that a message reached the meeting chat. Always tell participants yourself when the message is unavailable or cannot be confirmed.
## If a bot is also on the call
You can leave the Metaview bot enabled while trying the desktop app. If both capture the same conversation, Metaview normally keeps one set of notes from the more complete recording, preferring the bot when coverage is equivalent.
Only one person in a workspace can record the same meeting with the desktop app. If a colleague is already recording it, the app tells you instead of starting a second desktop recording.
Desktop recordings use the same Metaview access, sharing, retention, and deletion controls as other conversations. See [Privacy and Security](/account-management/privacy-and-security/overview) and [Access and permissions](/notes/access).
This documentation is built and hosted on [Mintlify](https://mintlify.com), a developer documentation platform.